Hi guys, please excuse the cheesy title. This was a hard one to come up with, and "family heart tree" sounds just as silly, so might as well go cheesy or go home I guess. I don't know guys, I'm kinda just winging it here.
In the spirit of trying to decorate for each holiday, even a little bit, I decided that I wanted to have a tree of sorts that expressed our family. I had a bunch of salt dough hearts leftover from the magnets that I made, and really didn't need another two dozen magnets so I thought these would work perfectly for the tree (these were the ones that I put string holes into before baking).
I choose most of the small hearts, a few medium hearts and two large hearts. Then I painted them various shades of pink and one heart I painted gold. I used plain old acrylic paint for this, but I can't tell you the colours because I mixed them all except the gold. And using my handy-dandy paint pens (if you can't tell already I love these things) I added initials and dates to some of the hearts. Once I was happy with how they looked I did a coat of Mod Podge on both sides and used fishing line to hang them up.
I used the large hearts for Luis and I's initials, the medium hearts are the kids initials and birth years. The one gold heart is the year that we got married, which was another medium heart. And the smallest hearts are the animals initials, because they are a part of our family too. There are a few hearts without anything on them too, just to balance the tree and make it not so busy.
Ideally I would have liked the branches to be a little fuller but these were off of our rose of Sharon bush in the backyard because we have no other trees with small branches around. They worked great and were the perfect size, I also used fishing line to attach these together in the vase.
Can you imagine having your kids help you paint these hearts and add things that they love to it? This is a great family craft to do together so that you can teach your kids that Valentine's Day (even though it's commercialized) is about love, not candy and valentines.
You don't even need to use salt dough for the hearts, you could use clay from a craft store or even card stock. This is as easy as you want to make it. This would also be great for a thankful tree around Thanksgiving using things that the kids are thankful for on leaves.
I can't wait to add to our tree as the kids get older and can add their own things to it, even if they are silly. Right now it just shows off special dates and initials of some very important people in this house.
That's it for today guys, come back soon and check out what else is new and what I'm actually getting accomplished. If you guys do make these I'd love to see them.
Kerby
Linking to:
Two Chicks and a Mom - Funtastic Friday #113
Ginger Snap Crafts - Wow Me Wednesday #286
Hello everyone, and what a beautiful Monday. Yes, I just said that but it's true because every Monday that passes gets us a little closer to spring. I love the winter for myself (in a way), but hate it for the kids. They just get so stir crazy, I cannot wait until we can start to go play outside again.
Today I want to share my Valentine's day shelf, which I have never done before. I usually decorate this shelf that we have in the living room for most seasons and always forget to share it with you guys. So I decided it was time to start showing you little things like this so that maybe you can be inspired. You don't need to decorate your whole house from top to bottom every holiday, a shelf or table can make you feel festive without overdoing it.
My shelf is pretty simple, and some of the items stay year round because I like how they look. Usually the candle holder, books and frames stay in some variation on the shelf and I add new elements for the upcoming holiday or season.
I used red bead garland inside the candle holder (with a pink candle) and a red and gold flower ornament to add some pops of red. Both of which are from my Christmas decor, showing that you can reuse elements in different seasons! I made this printable to pop in the frame, which is nice and simple. I have to ease myself into the holiday guys. Plus, it's something that Luis and I signed our notes with in high school. Memories. I will share this at the bottom in case you would like it as well.
The dried roses are actually from our first anniversary and stay out somewhere all year round. I love looking at them and remembering that they were from a special day. This makes the shelf feel more like Valentine's day to me because it's showing off things that are what this holiday is about. Then I added some heart garland to my empty frame, which was leftover paper from the heart alphabet matching game from a few weeks ago.
I used my trusty paint pens to make some arrow art on card stock to put in a smaller frame to finish the shelf. I love how this turned out, and will probably add it somewhere else in the house. I just drew what would fit into my frame and what I thought looked nice. Anyone can make a little art for a frame this way, don't be afraid to try.
A few simple accents to help add a little Valentine's day to our household, and all of it contained on a shelf. Not too shabby, definitely something that can be done anywhere by anyone. And you can see I didn't go too over the top with the colours, just some pops of bright red and gold.
And here's the printable for anyone who's interested.
Well that's it for today. Thanks for dropping by again and come back because I have some great stuff coming up.
Kerby
Linking to:
eighteen25 - Show & Tell #13
Ginger Snap Crafts - Wow Me Wednesday #285
Two Chicks and a Mom - Funtastic Friday #113
Hi guys, I have another Valentine's day related post for you guys. I know, what is happening?!? Like I have said previously, I'm trying to get into the spirit of each holiday from now on. Since I have yet to do this holiday, I have so many things to make or try.
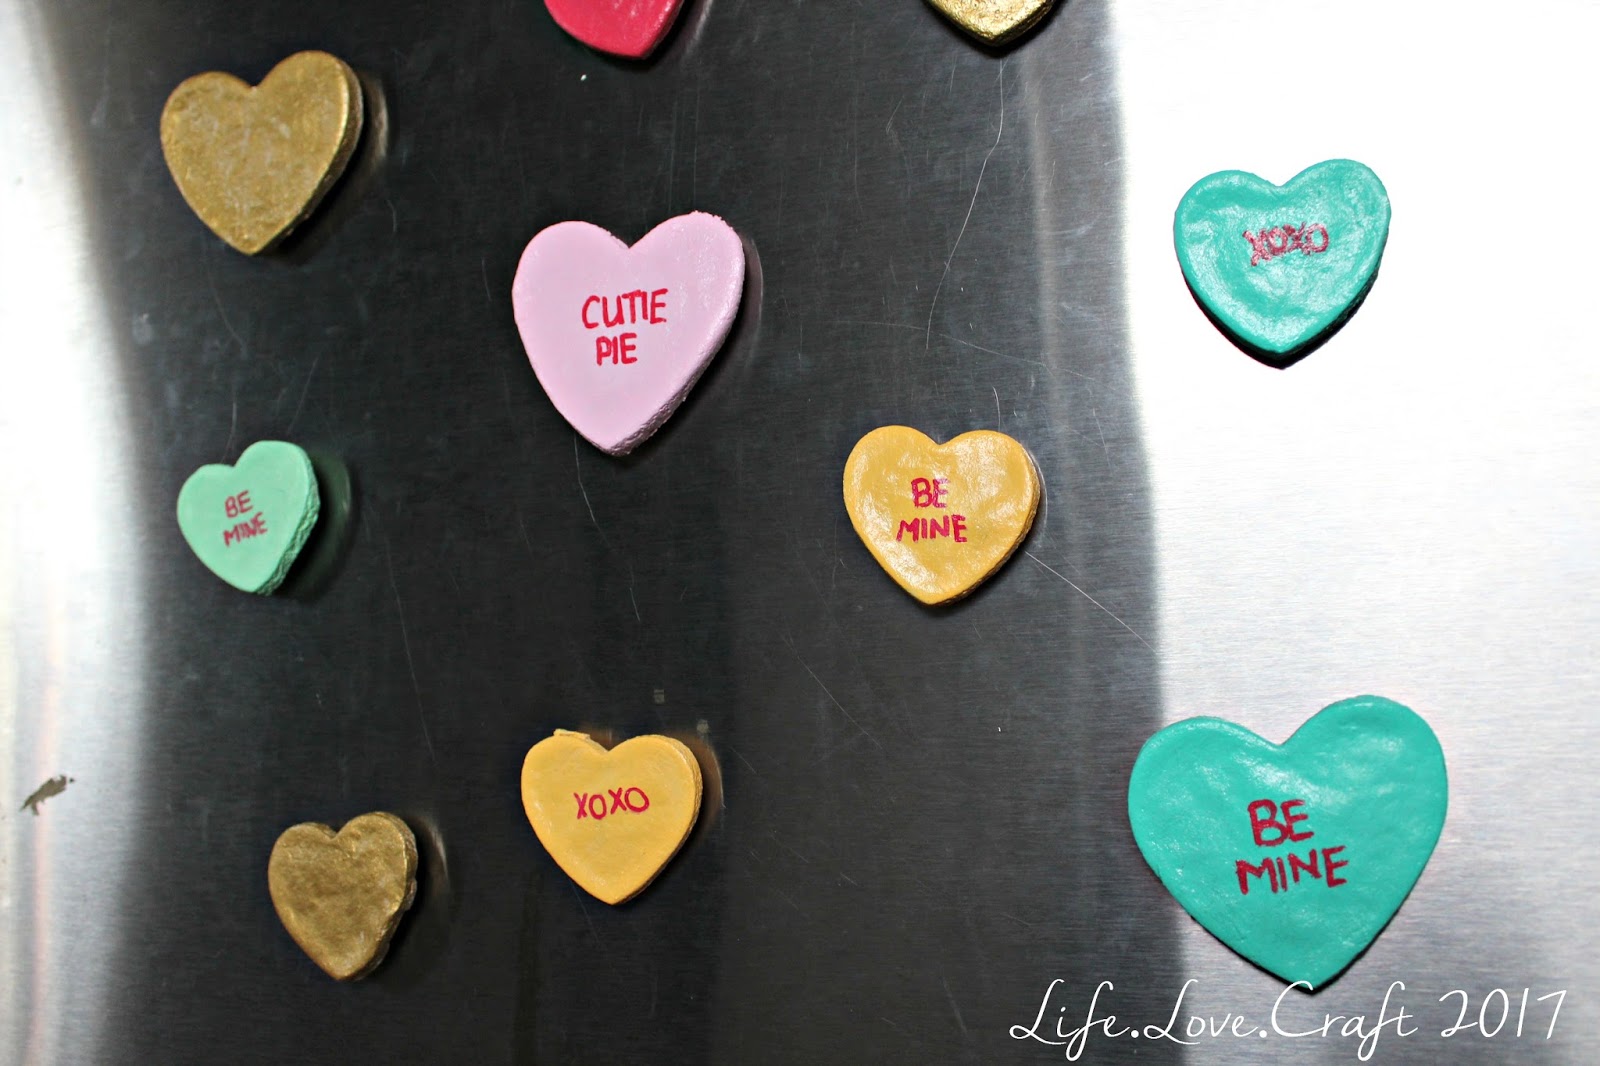
Today I want to share some Valentine's day magnets that I made using salt dough. If you've never used salt dough before you're missing out. It's probably the easiest thing to make and work with, just make sure that everyone knows they are not cookies. Mistakes have been made in this house.
First you need to make the salt dough, and you should have everything on hand.
2 cups of flour
1 cup of salt
1 cup of warm water
Mix the flour and salt together, add the warm water and mix the ingredients together until a ball of dough forms. Roll out to any thickness, though thinner does work better.
I would aim for roughly 1/4 inch, or less if you can manage it. Once you have a thickness you are happy with use cookie cutters in whatever shape you want. I used a few different sizes of hearts. You can keep re rolling the scraps until you can no longer salvage enough to cut your shapes.
If you are planning on using any in a hanging craft, use a straw to make string holes. You can see below that I made holes in roughly half of the hearts, just poking near the top with a straw until the dough is removed into the straw. These will be used in a later craft, stay tuned!
Bake at 250 degrees for 1-2 hours. I baked mine for an hour and a half then turned the oven off and left the hearts in for the last half hour while the oven cooled. They probably could have used the full two hours, but watch for the bottoms getting burned.
Let sit overnight and decorate however you like. I used some pastel colours for this craft as well as some paint for the other craft, planning on making conversation heart magnets. It ended up taking roughly three coats per side. I like to make sure that the salt dough is completely sealed with paint.
I'm sure you'll be very surprised to hear that the next step was to grab my red paint pen and write out the sayings on the magnets. I know, I'm as shocked as you are. I choose to stick with the basic sayings that you see on most conversation hearts, but you could get creative.
Next is a coat of Mod Podge on all sides and letting it dry. I used high gloss because that's what I had on hand, but I think matte might look better. Once dry glue magnets to the backs and let dry.
I didn't take any pictures of this step, but use tacky glue and larger magnets to support the hearts. I used hot glue because I didn't have tacky glue, don't do this. Especially if you are planning on these being gifts. These are just for us, so I deemed it safe enough. Plus, I couldn't get out to buy tacky glue.
These are pretty cute and would make fantastic gifts for grandparents or other family members. You can have the kids do thumb prints and date them as a great keepsake, and this is something you might want for your own fridge. Or you know, let them get creative and draw or write what they want.
A nice and easy craft, just how I like them. The whole craft took about a day including baking and drying time, with about an hour worth of effort. We will be making these again in the future, maybe next year, when the kids want to participate. I live for cute keepsakes like this.
Have you guys ever used salt dough to make magnets, or anything else? I'd love to see and get new ideas.
Kerby
Linking to:
Ginger Snap Crafts - Wow Me Wednesday #284
Two Chicks and a Mom - Funtastic Friday #112
eighteen25 - Show and Tell #7
Hello, hello and welcome back! I am finally starting to feel the motivation and momentum to get things accomplished. I've had a list of little projects (crafts or small projects that don't require power tools) for years. And I am finally making a dent in the list! I know it doesn't seem like much, but I am very excited about this.
Today is a special day, I actually have a Valentine's Day related post! The first one in two years, and only the second I have ever done. I'm not a huge Valentine's Day person and have not made a big deal about it in past years, but with the kids I want to at least make an effort. Once they get into school it will be something to look forward to, so I can suck it up and do a few crafts for them. Like I need a reason, am I right?
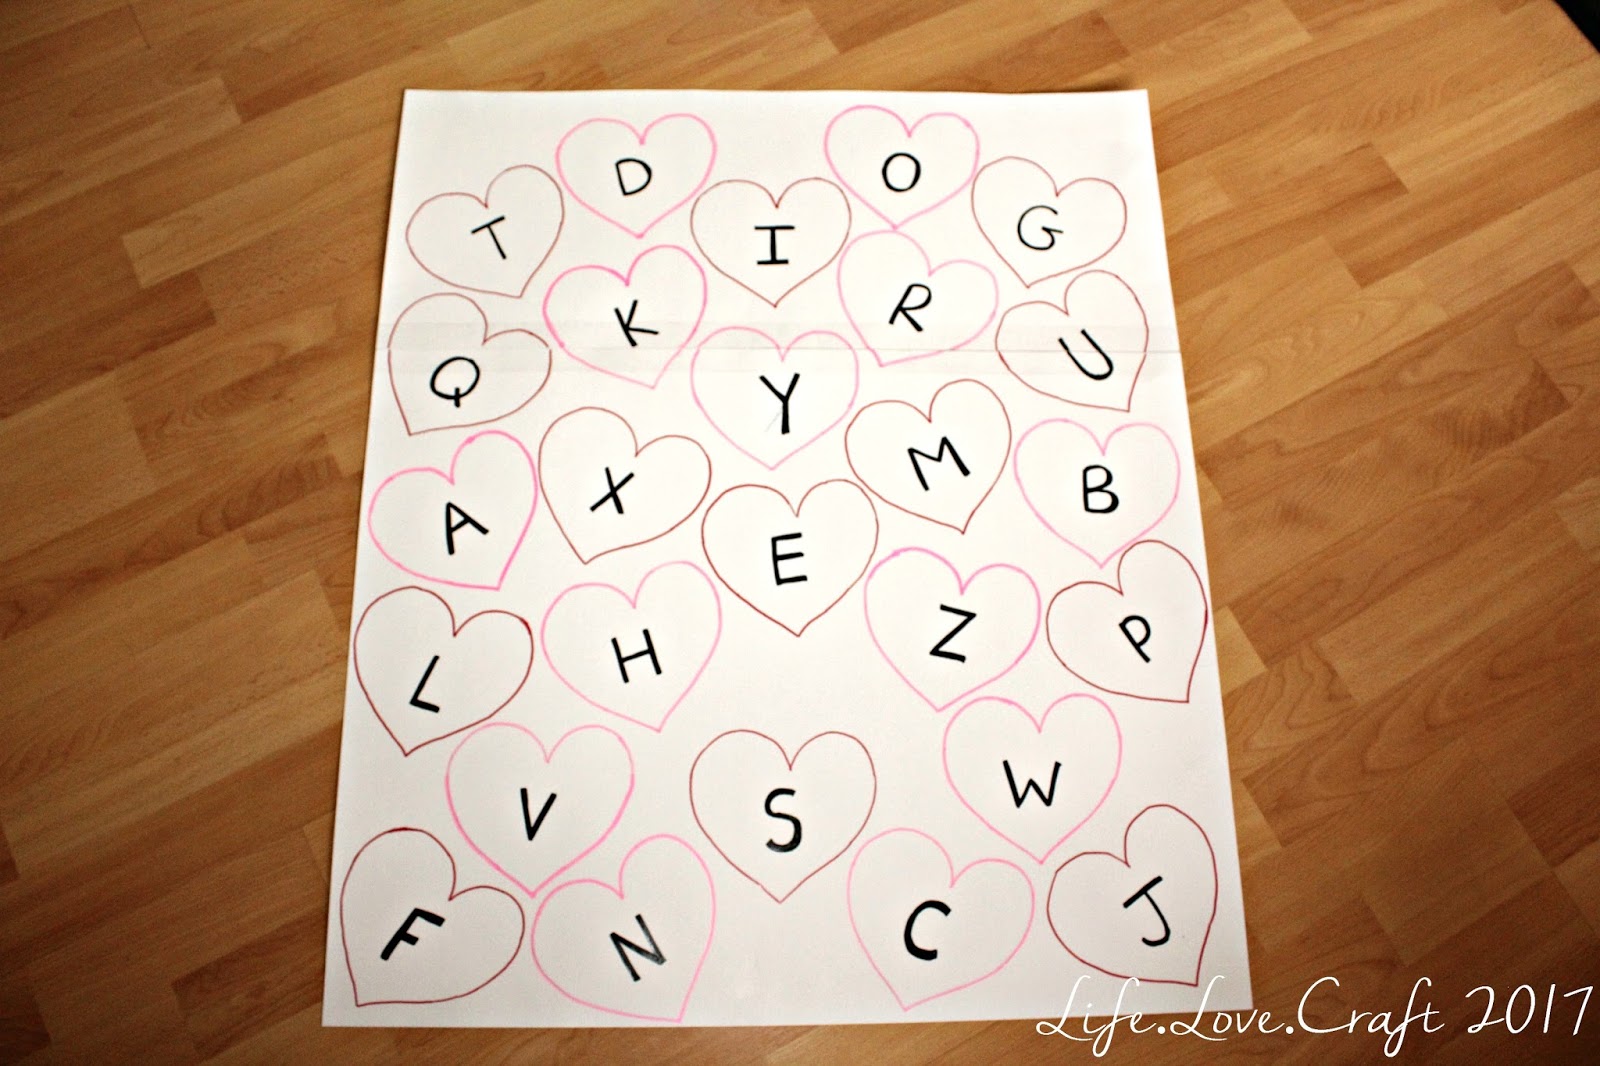
Anyway, back to the matter at hand. I have had this idea pop up on Pinterest for every holiday, different learning tools (alphabet, colours, numbers, etc...) and in every size, and with Braxton's LOVE of the alphabet it was an easy choice to make. I wasn't sure about the size I was going to make and was aiming for about the size of a Bristol board.
The supplies were minimal since I have so much on hand at all times, but here's a general list if you need one:
1-2 pieces of Bristol board (I used 1 1/2)
10-14 pieces of card stock
Markers (I used paint pens because I don't have markers)
Tape (depending on size)
First I cut out twenty six hearts on four different types of card stock, just free-handing the first heart and using it to cut the rest out. If you don't care about the hearts being perfectly the same, cut two or three pieces of paper at the same time. I chose to put the lower case letters on the hearts using a black paint pen, but a Sharpie would work too.
Then I used these hearts to trace onto the board, and because of the size of my hearts I used just under half of a second piece. If this happens to you, just tape the two pieces together with packing tape after you are finished writing everything on the boards. Again I used paint pens to make the hearts red and pink, the used the black paint pen to put the upper case letters in the hearts.
Now step back and watch your toddler go! I set this up while Braxton was busy in his room so when he came downstairs he was so surprised and excited. He didn't even need me to tell him what to do, he just went right for it.
Singing the alphabet while they work and making the sounds the letters makes this a fun and educational toy. The best part? It cost me less than $2 to make because I had everything I needed except the Bristol board. I love being able to make learning fun for the kids and every chance I have to expose them to the alphabet, numbers, colours (you name it!) I will take.
I am sure that Braxton loves these types of toys and learning tools so much because we are constantly exposing him to them and playing with them ourselves. It's never too early to start the foundation that they will need once they get to school. Okay Mom voice over now.
And I never feel bad about a cheap and easy craft, especially one that helps my kids learn! I haven't let Kaley near it because I am 100% certain she will rip everything into little pieces. A great alternative is to buy the foam hearts at the dollar store, that way they can't rip them easily. I didn't see them until after I had cut the hearts out already, but will definitely use them in the future because I am sure I will be making more of these for Kaley.
Now you have a fun way to incorporate something educational into Valentine's Day for your toddlers. Let me know if you try this out and what you change. Stay tuned for what I used the last little piece of Bristol board for! I bet you can guess, but still, come back and see.
Kerby
Linking to:
Two Chicks and a Mom - Funtastic Friday #111
Naptime Creations - Great Things to Make for Kids 1/31/17
Ginger Snap Crafts - Wow Me Wednesday #284
eighteen25 - Show and Tell #7
Hey there! Sorry for my little absence, I've been extremely busy trying to get a few big things done around here. Hopefully I will be sharing them soon (And I have to say, I completely didn't notice that the title rhymes until about the third time I read it).
Anyway, today I want to share a quick and easy craft for Valentine's day. This was actually pretty fun to do, it reminded me of paper mache. You only need a few supplies and about 10 minutes of your time. Easy peasey.