Hello everyone and happy weekend! How quick is this year going? I can't believe it's almost the end of February, it's like I blinked and a month flew by. But I'd rather a winter month disappear quickly than a summer month. Fingers crossed we only have two or so months left until we start to see spring.
Back in January I shared an alphabet matching game for Valentine's Day (which you can find here), and I mentioned that I had leftover Bristol board that I had a plan for. Well today I am sharing what you can make with a small piece of Bristol board and a few minutes of your time.
I thought that numbers would be a good compliment to the alphabet, though Braxton is becoming such an old pro at these I might have to get creative and start with some different learning tools.
I traced the square ten times onto the Bristol board, then traced the star inside the square in a pattern. I used my trusty paint pens in blue, green and purple. Then I used a stencil to add the number to the board and the pieces of foam in black paint pen.
For this matching game I used foam shapes that I had on hand from a project that went bust a few years ago, and I thought they would work perfectly. I mentioned using foam pieces with the alphabet matching game as well. Ideally I would have had ten of one shape, but alas I only had six. So I got creative and made the game a little more challenging, hopefully. At least it looks pretty.
Braxton loved this one too and again needed no direction. He had a little more fun bending the foam shapes and adding them to the puzzle, and some of the shapes got quite ruffled. It is such a great exercise that gets their minds working, even if they know how to count to ten.
This was another inexpensive project that took zero money and little time, and it gives Braxton something new to play with and think about. And once Kaley gets a little older she can start to play with it as well. The foam will stand up to little hands so much better than paper or card stock, so definitely go for foam if you have the option.
This is a great way to kill some time during the winter months where everyone gets so restless, including mom and dad. Give this a try and let me know how it turns out!
Kerby
Linking to:
Tatertots and Jello - BFF Link Party 2/17/17
eighteen25 - Show and Tell #15
Gingersnap Crafts - Wow Me Wednesday #287
Two Chicks and a Mom - Funtastic Friday 2/23/17
Hello, hello and welcome back! I am finally starting to feel the motivation and momentum to get things accomplished. I've had a list of little projects (crafts or small projects that don't require power tools) for years. And I am finally making a dent in the list! I know it doesn't seem like much, but I am very excited about this.
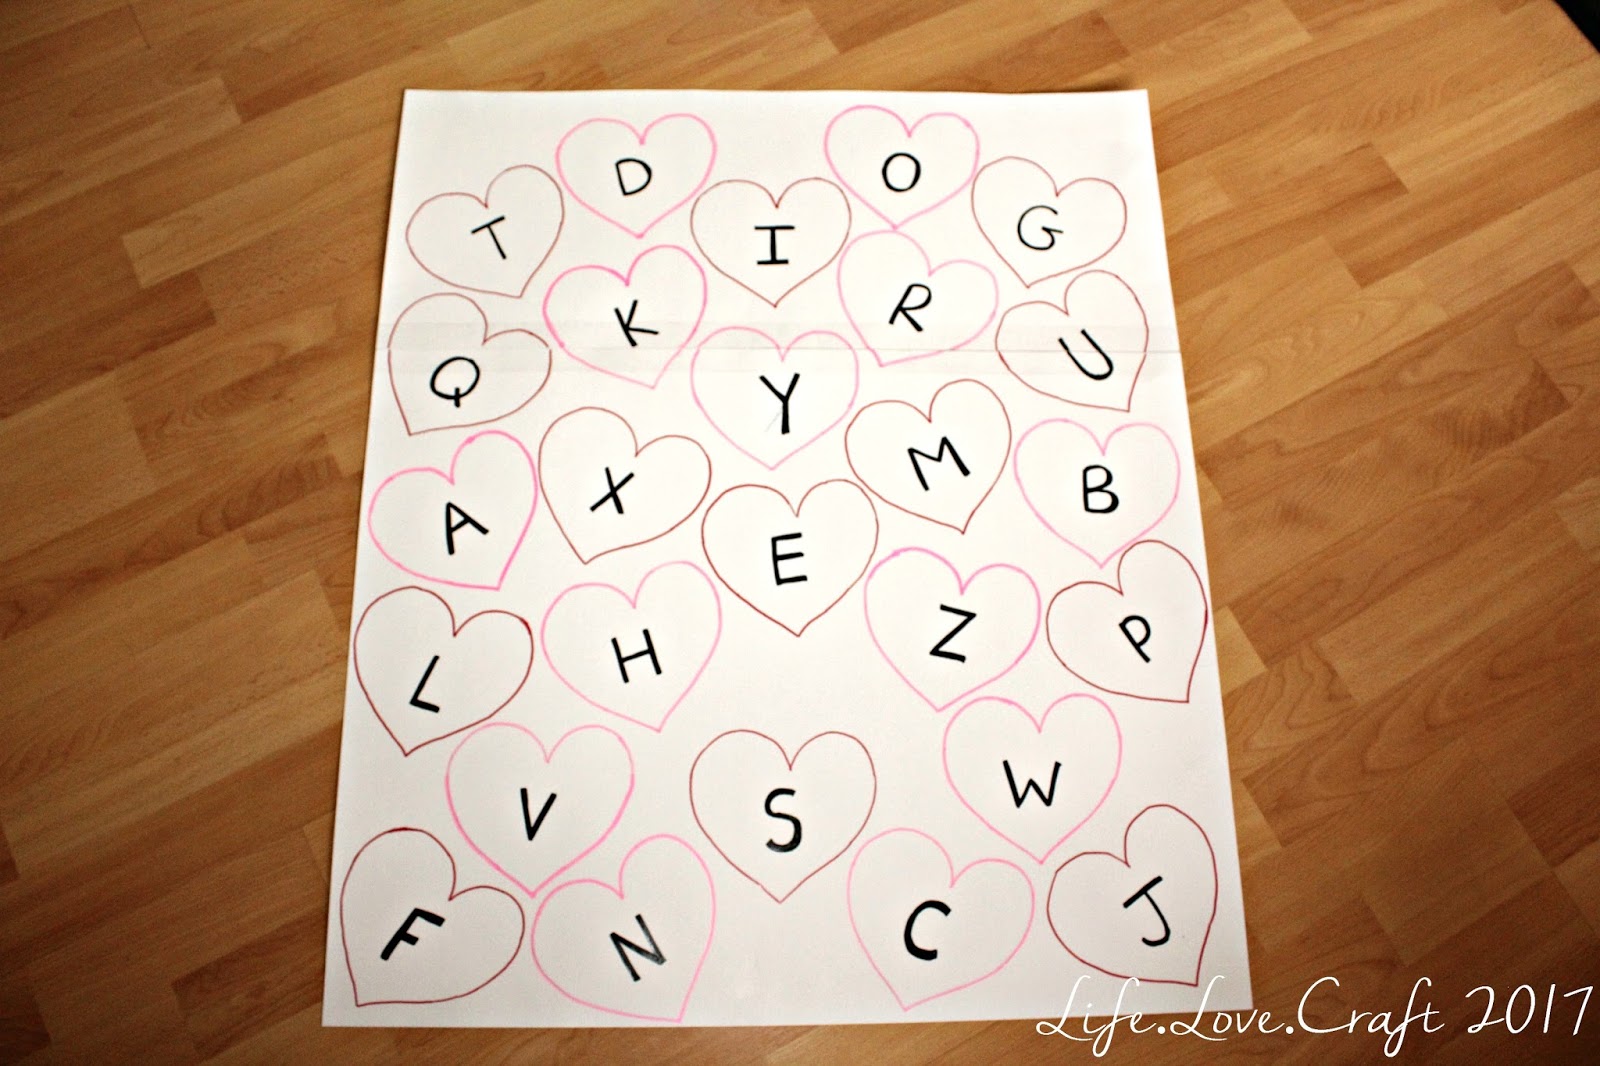
Today is a special day, I actually have a Valentine's Day related post! The first one in two years, and only the second I have ever done. I'm not a huge Valentine's Day person and have not made a big deal about it in past years, but with the kids I want to at least make an effort. Once they get into school it will be something to look forward to, so I can suck it up and do a few crafts for them. Like I need a reason, am I right?
Anyway, back to the matter at hand. I have had this idea pop up on Pinterest for every holiday, different learning tools (alphabet, colours, numbers, etc...) and in every size, and with Braxton's LOVE of the alphabet it was an easy choice to make. I wasn't sure about the size I was going to make and was aiming for about the size of a Bristol board.
The supplies were minimal since I have so much on hand at all times, but here's a general list if you need one:
1-2 pieces of Bristol board (I used 1 1/2)
10-14 pieces of card stock
Markers (I used paint pens because I don't have markers)
Tape (depending on size)
First I cut out twenty six hearts on four different types of card stock, just free-handing the first heart and using it to cut the rest out. If you don't care about the hearts being perfectly the same, cut two or three pieces of paper at the same time. I chose to put the lower case letters on the hearts using a black paint pen, but a Sharpie would work too.
Then I used these hearts to trace onto the board, and because of the size of my hearts I used just under half of a second piece. If this happens to you, just tape the two pieces together with packing tape after you are finished writing everything on the boards. Again I used paint pens to make the hearts red and pink, the used the black paint pen to put the upper case letters in the hearts.
Now step back and watch your toddler go! I set this up while Braxton was busy in his room so when he came downstairs he was so surprised and excited. He didn't even need me to tell him what to do, he just went right for it.
Singing the alphabet while they work and making the sounds the letters makes this a fun and educational toy. The best part? It cost me less than $2 to make because I had everything I needed except the Bristol board. I love being able to make learning fun for the kids and every chance I have to expose them to the alphabet, numbers, colours (you name it!) I will take.
I am sure that Braxton loves these types of toys and learning tools so much because we are constantly exposing him to them and playing with them ourselves. It's never too early to start the foundation that they will need once they get to school. Okay Mom voice over now.
And I never feel bad about a cheap and easy craft, especially one that helps my kids learn! I haven't let Kaley near it because I am 100% certain she will rip everything into little pieces. A great alternative is to buy the foam hearts at the dollar store, that way they can't rip them easily. I didn't see them until after I had cut the hearts out already, but will definitely use them in the future because I am sure I will be making more of these for Kaley.
Now you have a fun way to incorporate something educational into Valentine's Day for your toddlers. Let me know if you try this out and what you change. Stay tuned for what I used the last little piece of Bristol board for! I bet you can guess, but still, come back and see.
Kerby
Linking to:
Two Chicks and a Mom - Funtastic Friday #111
Naptime Creations - Great Things to Make for Kids 1/31/17
Ginger Snap Crafts - Wow Me Wednesday #284
eighteen25 - Show and Tell #7
Hi everyone, this is a little late but I can't believe Braxton is already three! It's so crazy to think that he was just a little baby in my arms. Now I can barely fit him in my arms at all! He is literally over half as tall as me, and that makes me so sad!!!!!
Braxton was a tough cookie this year when it came to a birthday party theme, I think I went through about five before we settled on an alphabet party. He would love a show for about a month and then hate it forever, usually right after I had the party all planned out. In fact, I managed to get almost all of the decorations complete for a Yo Gabba Gabba party before he decided that he hates that show with a passion. Sigh.
But the one thing that has never wavered is his love of the alphabet. Anything with the alphabet on it is a winner in his book, so having this theme to fall back on was great. Though planning a party in less than a month is not what I am used to and I panicked quite a bit over getting everything accomplished. It wasn't my finest planning or decorating, but it definitely got the job done.
Behind the table I made some paper rosettes and pinwheels in a variety of colours, with red, green and blue being the main colours. Just like the ABC book by Dr. Seuss, which is a favourite book of Braxton's. Not so much for Mommy or Daddy though, and has been assigned to the car for road trips. And a quick birthday sign using printed letters on card stock finished the table area off.
These were easy once you got a system down, but there was a little trial and error. Mostly because I did them over the course of about 10 nights and would completely forgot what I did the day before. And the pinwheels used alphabet scrapbook paper and some present scrapbook paper to add some fun pop of colour.
The food, which I forgot to take pictures of, was marked with fun little cards that used the alphabet. This was a little tough to think of foods that didn't all start with the same letters!
We served sandwiches, pizza rolls, vegetables, meatballs and of course cake! And as usual we had way too much food leftover, so guess who didn't have to cook dinner for a few days? That's right, me.
I also made an alphabet banner that was originally to go over the table, but i ended up miscalculating it's length and it ended up being about three feet to long. So instead, I decided to put it over our large front window. I usually decorate this area anyway, so it worked out.
A cute little sign for the treat bags, mimicking the same signs that were on the table completed the decor for the party. Like I said, not a lot of decorations but it still looked great.
The birthday boy was tough to get pictures of this year because he kept trying to run away with everything, but we managed to get a few. Kaley thought it was her birthday and kept trying to open the presents, but we managed to get her occupied with a few envelopes.
It was such a fun day, and Braxton got spoiled as usual. And my silly boy started to love Elmo about a week before his birthday, so his attention was caught with the cards and gift bags. What a sweetheart, he kept thinking the cards were the gifts.
We feel bad when December rolls around because both kids have to wait all year for their birthdays, and then Christmas is right around the corner (especially for Kaley). So they can literally have all their gifts in a 3 week period. But our families are so supportive and loving, and help make this easier by showering our kids with love and attention.
Well, that's all I've got for you guys. It has been so crazy trying to get both parties ready as well as Christmas ready, I can't believe I even remembered to take these pictures!
If you want to see Braxton's previous birthday party themes, you can find them here: A Winter One-Derland, A Wiggly Second Birthday.
Thanks again for reading along with my kids, hopefully I will be able to get back to crafting and household updates again soon.
Kerby
Hello and happy Wednesday! I am super excited that I actually had a post in the works before Kaley was born that I can share with you guys. Back in July I shared a toddler activity that I tried with Braxton that didn't go as planned. My difficult little man kept his name and wanted nothing to do with mixing paint in a bag. Oh well.
After his party in December I took the stars that I had on the wall and put them lower for him to play with. He loved them! Eventually they were destroyed because they were just made of scrapbook paper, but that gave me an idea. Braxton loves to count to ten and the alphabet, I wasn't about to cut out 26 things. But ten, ten was manageable.
Hello there one and all. A little while ago I shared that my little man wasn't so little anymore and turned two! I cannot believe how fast this year flew by, and I suspect it's just going to get worse. Today I want to share some of his party details with you guys.
I'm not sure if anyone is familiar with The Wiggles, but Braxton is obsessed with them. He loves them and cannot get enough. I swear he might even like them more than Luis or I some days, and he definitely thinks that Emma is his girlfriend. Sorry ladies, he's into much older women apparently. Anyway, so with this fanatical love it was easy to pick a theme for his party this year. It was a Wiggly Party.
Hello and happy Sunday! I don't have anything to share with you guys other than today my little man is getting a little bigger and turns two! I cannot believe how fast a year can fly, and how big my little guy has grown.
You are such a smart and funny little boy. You make us laugh everyday with a personality that is so large. You are stubborn just like your Mommy and love to laugh just like your Daddy. Everyday we learn something new and exciting, and I love that I get to share this amazing time in your life. I can't wait to see how you grown over the next 365 days. I want you to grow up and at the same time I want you to never grow up. We love you, always and forever.
We managed to have the same picture taken almost a year apart. And we will do this again every year until I can't force my children to do so, maybe eventually we will be the ones with our hands held.
Kerby
Hello there and welcome back. Today I want to share a fun activity I saw on Pinterest forever ago and thought I would try with Braxton (the original pin is here, if you would like to take a look). We had a few super hot days where we didn't want to be outside for too long, so it was the perfect time to give a toddler activity a try.
You only need a few supplies: a plastic zipper bag (or two if you're me), some washable paint and some painter's tape (masking tape would work as well). I poured a large amount of the washable paint into a Ziploc bag, then doubled bagged it. With my history, one bag would have caused a large mess. Better safe than sorry.
Use the painter's tape to tape this bad boy to a window or glass door. I taped mine to our back sliding door, please ignore any drool stains. And I forgot to clean the toys and such from the deck, so please pretend they are not there. Thanks a bunch, you guys rock.
Then try to get your toddler to acknowledge that you even did anything. Seriously! It took Braxton about two hours to even pay attention to the paint bag, even when I started playing with it. He just ignored it and decided that we needed to wrestle instead.
Feeling my utter defeat, he gave me a few pity hits and went on his way.
No one can say I didn't try. Maybe it was the fact that I used white paint? Maybe I will dig out the red washable paint and give this another try. If not, oh well. Not all toddlers like the same thing. Back to the drawing board I guess.
Have you guys tried any fun toddler activities? Feel free to share. I want to gather a bunch for the upcoming cooler weather (boo!) and new arrival. Momma is going to need some fun things to keep everyone happy this winter! Wish me luck on my next adventure into toddler fun.
Kerby
Well it's finally done. I told you I would have an update about the big boy room soon, and here it is. I can't believe how long things can take sometimes, especially when you have a toddler that has decided that naps aren't for him anymore. It's a daily struggle, but so far I am "winning" (if you can call a cranky toddler a win).
[If you missed out on previous posts, you can find the plan here and the first update here]
Today I want to share the completed room as far as construction goes. I still have quite a bit of decorating to get done, but so far I am happy with how it has turned out. I left off after we had just finished the painting and were about to start the trim. We used primed 4-inch MDF boards for the trim (the same that we used in the nursery) and did two coats of white semi gloss paint before they went up:
Once all of the boards were ready Luis broke out the miter saw and trimmed the room out. It didn't take too long for him to power through this, even with a closet to trim out with low shelves (I'm sure he was really loving me while he did that).
As it can go when you are renovating, unexpected things can happen. The first thing that happened was that the ceiling needed to be painted something fierce. The previous owners did a terrible job with painting pretty much everything, so we have slowly been updating every painted surface. The second thing was that the new trim wasn't covering the gaps between the flooring and the walls:
Not exactly what you want to see after you have put up new trim. A quick run to the hardware store for some quarter-round and a few extra cuts and nails and the problem was solved. Now it was time to fill the holes, mud the joints and corners, caulk along the tops of the trim and do a coat of the trim paint.
How's that for a huge change? Doesn't it look so amazing now compared to the old yucky trim? I'm ready to do this in the rest of the upper level and main floor today. Luis has some objections though. I guess I can wait and just enjoy this room for the time being.
It is amazing what some paint and new trim can do to transform a space. As you can see above we did not replace the window or door trim, we will do that when we replace the window and door. We aren't exactly sure when that will happen, but since they both work fine on a daily basis they aren't at the top of the list.
Now that the room is toddler friendly, we moved Braxton's bed and some furniture in here. He loves this room and he spent the first 20 minutes play screaming to hear the echo and grinning after each scream.
And speaking of lists, here's the updated to-do list for the big boy room:
- Remove everything from the room
- Remove closet doors
(we are going to go with no closet door until Braxton is a little older.
I like having the closet open so I don't need to worry about him
getting his fingers caught or the cats wanting to hide in there)
- Remove old trim
- Prime over the dark green and paint walls lighter tone
- Install new trim and paint white
- Paint window trim (we will be replacing the windows eventually, but until then the trim needs to be painted)
- Find bedding (we are
going to leave the mattress on the floor for the first little bit until
Braxton is used to having no rails)
- Make art to hang on the walls
- Make teepee to fit in his room
- Make some pillows to make the teepee comfy
- Get storage solution for clothes in the closet
So close! I am hoping to get the storage solution shortly as well as making some art. The teepee might take a little bit, but Braxton won't be in the room sleeping for a little bit. Until then, I am going to sit back and watch him Benny Hill style run between all the rooms upstairs joyfully screaming his face off.
Kerby
Hey there, I am so happy to be able to share some progress in Braxton's big boy room with you guys. It doesn't seem like we got a ton done, but when you spend four days painting in every spare moment you have (including naps and baby-free hours) it feels like you climbed a mountain.
Last time I showed you the room it was full of crap stuff. As a refresh to what the paint colour used to be, here is a picture of the room cleaned out:
Hello everyone, hopefully everyone is enjoying the warmer weather. Braxton has been itching to go outside and walk for weeks, so I have been indulging in sunny walks whenever I can.
That being said, my little guy isn't so little anymore which is bumming me out. Braxton has recently started to try climb things and his crib is the main thing that he is testing out. We are terrified that he is going to fall out because we have hardwood floors upstairs, so we thought we would start the process of a big boy room. He has always been slow to transition (i.e. stubborn as heck), so starting early is probably in our best interest. I cannot believe that I am already starting plan out Braxton's big boy room.
We are going to move him into the spare bedroom, which has just been a storage/dumping ground for the last few years. Here is what it looks like currently. Please excuse the mess, we are in the process of moving everything to store, sell, donate or throw away:
Hello there and happy Friday everyone! I've been busy painting and I am so glad to show you what I've been up to. I have finally finished the mural in Braxton's playroom!
I've always wanted to have a playroom that I can paint a mural on, I used to look at pictures and think "I want to do that". It's a weird thing to want to do, but I am weird that way. Anyway, this playroom has been the best thing we have ever decided to do. Braxton loves that room and spends about 85% of his day in there playing with his toys and reading his books. I love that I was able to add something personal to his room for him.
I chose the two walls that were not visible from the rec room, mostly so that the playroom didn't look too busy. First thing was to paint the sky, which I just drew all willy nilly by hand. I used the Behr colour Rio Sky, it's a great light grey-blue:
Sorry for the bad pictures, it's hard to take a good picture in a room with no windows/natural light at night (and also please excuse the wet paint in most of the pictures as well. I have limited time to paint, so it's usually late at night).
After two coats of the sky, I painted the grass a darker green. The original wall colour it just too light to be part of the mural. I chose Sage Brush, also by Behr:
I decided that I would also use this colour for some trees, so I drew those in as well. My mom came in the day after I drew these and said that she liked my clouds. Alas, they are not clouds just very cartoon-ish trees. I decided to keep the mural simple, and I thought that I would draw everything they way I used to draw when I was younger. It is for a playroom after all:
After two coats of the Sage Brush, I went into my stash of paints and mixed about six different greens and white for a darker colour to finish off the trees. Again I did two coats of the darker tree colour and had a ton of paint leftover, so I decided to put some bushes in the grass. I was trying to break up the light green area, and I think it worked out pretty well:
 I used a brown I also had in my stash for the tree trunks. I wanted the trunks to all be a little different, so I did a few styles. I love how the "y" trunks turned out. I wanted to add an evergreen tree in as well because they are very common around us and keeps things interesting. Four of the exact same trees on each side might look a little boring.
Here is a picture of each wall:
If you didn't notice before there is a tree wrapped around the corner. I had no idea how to make each side looked balanced without being crowded, so I took a chance and used the corner as the centre of a tree. I think I worked out great:
I used a brown I also had in my stash for the tree trunks. I wanted the trunks to all be a little different, so I did a few styles. I love how the "y" trunks turned out. I wanted to add an evergreen tree in as well because they are very common around us and keeps things interesting. Four of the exact same trees on each side might look a little boring.
Here is a picture of each wall:
If you didn't notice before there is a tree wrapped around the corner. I had no idea how to make each side looked balanced without being crowded, so I took a chance and used the corner as the centre of a tree. I think I worked out great:
I cannot express how happy I am to have this done and with how it turned out. It's like a weird bucket list item I can cross off. Here's one more picture because I am just that happy with it:
Maybe down the road if I feel really ambitious I will try to add a squirrel or bunny into the mix. If I'm ever feeling wild and crazy maybe I will try to draw some apples into the tree. I know, it's hard to keep up with this wild girl.
Have you guys painted any murals? They are a lot of work but look so good and are more than worth it in the end.
Kerby
Linking to:
A Night Owl - Monday Funday 2/15/15
Naptime Creations - Create, Link, Inspire #216
I Heart Naptime - Link Party Palooza #85
Ginger Snap Crafts - Wow Me Wednesday #197
A Handful of Everything - Great Idea Thursdays #90
Hello there and happy Wednesday. I have to say, I always feel weird with my greetings. I never really know how to start off, so I feel like I come across as awkward. Hopefully not, but being my awkward self I thought I would point it out to you guys.
Anyway today I just wanted to share a personal battle I have going on, against a picky almost 14 month old that lives in my house. I know everyone's kids are picky at one point or another, but man! This kid gives me a run for my money every day! One day he loves applesauce, then next day he acts like I'm actively trying to poison him by giving him the exact same applesauce from the same darn container.
Braxton does not want to eat anything that is not baby food unless it is pieces of chicken (turkey, pork, eggs, roast, etc..), french fries, or cucumbers. Anything else is immediately thrown off of his highchair for the dogs to battle over.
Some days it gets really frustrating because we are still buying baby food. He is still eating food that is designed for children up to 6 months younger than him. We do try to give him something with every meal, and just hope that today he will actually eat said piece of food.
Case in point: He loves bananas in baby food, he will eat the whole container and then get mad when it's gone. But, give the kid an actual banana to eat, and he hates it.
This is the "I'm not eating this and don't want it touching anything on my plate" spot. Whatever he is done with, or doesn't feel like eating ends up either here or on the floor.
We have tried everything we have read, done what other parents have suggested and even what the doctor has suggested. Nothing seems to stick, he just gets mad if we try to force anything and the meal is over. So our new motto is "just try one bite, you might like it" (if you get Treehouse, name the song). It's getting better, he is actually willing to try what we put on his plate. It's the eating part that we are struggling with. But this wasn't surprising as it took him almost a month to eat baby cereal when we started solids.
The other thing we have been battling is constant constipation as Braxton will not drink anything. Water, milk, juice? Nope. In the last week or so he has started to pick up his sippy cup and take little drinks out of it, but I'm not holding my breath that he's going to start guzzling water anytime soon. It's just as frustrating because I know that if he would just drink something, he would feel better. So we keep trying until he either starts to drink on his own, or he understands why he is feeling bad when he doesn't drink. I am crossing my fingers that the warm weather will get him drinking voluntarily and this problem will be solved.
Rant over. Sorry to have a conversation with myself at you guys, I just felt like sharing how frustrating my days can be. Does anyone else have a picky eater? Any suggestions, because I am open to anything.
Kerby