Hi guys, please excuse the cheesy title. This was a hard one to come up with, and "family heart tree" sounds just as silly, so might as well go cheesy or go home I guess. I don't know guys, I'm kinda just winging it here.
In the spirit of trying to decorate for each holiday, even a little bit, I decided that I wanted to have a tree of sorts that expressed our family. I had a bunch of salt dough hearts leftover from the magnets that I made, and really didn't need another two dozen magnets so I thought these would work perfectly for the tree (these were the ones that I put string holes into before baking).
I choose most of the small hearts, a few medium hearts and two large hearts. Then I painted them various shades of pink and one heart I painted gold. I used plain old acrylic paint for this, but I can't tell you the colours because I mixed them all except the gold. And using my handy-dandy paint pens (if you can't tell already I love these things) I added initials and dates to some of the hearts. Once I was happy with how they looked I did a coat of Mod Podge on both sides and used fishing line to hang them up.
I used the large hearts for Luis and I's initials, the medium hearts are the kids initials and birth years. The one gold heart is the year that we got married, which was another medium heart. And the smallest hearts are the animals initials, because they are a part of our family too. There are a few hearts without anything on them too, just to balance the tree and make it not so busy.
Ideally I would have liked the branches to be a little fuller but these were off of our rose of Sharon bush in the backyard because we have no other trees with small branches around. They worked great and were the perfect size, I also used fishing line to attach these together in the vase.
Can you imagine having your kids help you paint these hearts and add things that they love to it? This is a great family craft to do together so that you can teach your kids that Valentine's Day (even though it's commercialized) is about love, not candy and valentines.
You don't even need to use salt dough for the hearts, you could use clay from a craft store or even card stock. This is as easy as you want to make it. This would also be great for a thankful tree around Thanksgiving using things that the kids are thankful for on leaves.
I can't wait to add to our tree as the kids get older and can add their own things to it, even if they are silly. Right now it just shows off special dates and initials of some very important people in this house.
That's it for today guys, come back soon and check out what else is new and what I'm actually getting accomplished. If you guys do make these I'd love to see them.
Kerby
Linking to:
Two Chicks and a Mom - Funtastic Friday #113
Ginger Snap Crafts - Wow Me Wednesday #286
Hello everyone, and what a beautiful Monday. Yes, I just said that but it's true because every Monday that passes gets us a little closer to spring. I love the winter for myself (in a way), but hate it for the kids. They just get so stir crazy, I cannot wait until we can start to go play outside again.
Today I want to share my Valentine's day shelf, which I have never done before. I usually decorate this shelf that we have in the living room for most seasons and always forget to share it with you guys. So I decided it was time to start showing you little things like this so that maybe you can be inspired. You don't need to decorate your whole house from top to bottom every holiday, a shelf or table can make you feel festive without overdoing it.
My shelf is pretty simple, and some of the items stay year round because I like how they look. Usually the candle holder, books and frames stay in some variation on the shelf and I add new elements for the upcoming holiday or season.
I used red bead garland inside the candle holder (with a pink candle) and a red and gold flower ornament to add some pops of red. Both of which are from my Christmas decor, showing that you can reuse elements in different seasons! I made this printable to pop in the frame, which is nice and simple. I have to ease myself into the holiday guys. Plus, it's something that Luis and I signed our notes with in high school. Memories. I will share this at the bottom in case you would like it as well.
The dried roses are actually from our first anniversary and stay out somewhere all year round. I love looking at them and remembering that they were from a special day. This makes the shelf feel more like Valentine's day to me because it's showing off things that are what this holiday is about. Then I added some heart garland to my empty frame, which was leftover paper from the heart alphabet matching game from a few weeks ago.
I used my trusty paint pens to make some arrow art on card stock to put in a smaller frame to finish the shelf. I love how this turned out, and will probably add it somewhere else in the house. I just drew what would fit into my frame and what I thought looked nice. Anyone can make a little art for a frame this way, don't be afraid to try.
A few simple accents to help add a little Valentine's day to our household, and all of it contained on a shelf. Not too shabby, definitely something that can be done anywhere by anyone. And you can see I didn't go too over the top with the colours, just some pops of bright red and gold.
And here's the printable for anyone who's interested.
Well that's it for today. Thanks for dropping by again and come back because I have some great stuff coming up.
Kerby
Linking to:
eighteen25 - Show & Tell #13
Ginger Snap Crafts - Wow Me Wednesday #285
Two Chicks and a Mom - Funtastic Friday #113
Hi guys, I have another Valentine's day related post for you guys. I know, what is happening?!? Like I have said previously, I'm trying to get into the spirit of each holiday from now on. Since I have yet to do this holiday, I have so many things to make or try.
Today I want to share some Valentine's day magnets that I made using salt dough. If you've never used salt dough before you're missing out. It's probably the easiest thing to make and work with, just make sure that everyone knows they are not cookies. Mistakes have been made in this house.
First you need to make the salt dough, and you should have everything on hand.
2 cups of flour
1 cup of salt
1 cup of warm water
Mix the flour and salt together, add the warm water and mix the ingredients together until a ball of dough forms. Roll out to any thickness, though thinner does work better.
I would aim for roughly 1/4 inch, or less if you can manage it. Once you have a thickness you are happy with use cookie cutters in whatever shape you want. I used a few different sizes of hearts. You can keep re rolling the scraps until you can no longer salvage enough to cut your shapes.
If you are planning on using any in a hanging craft, use a straw to make string holes. You can see below that I made holes in roughly half of the hearts, just poking near the top with a straw until the dough is removed into the straw. These will be used in a later craft, stay tuned!
Bake at 250 degrees for 1-2 hours. I baked mine for an hour and a half then turned the oven off and left the hearts in for the last half hour while the oven cooled. They probably could have used the full two hours, but watch for the bottoms getting burned.
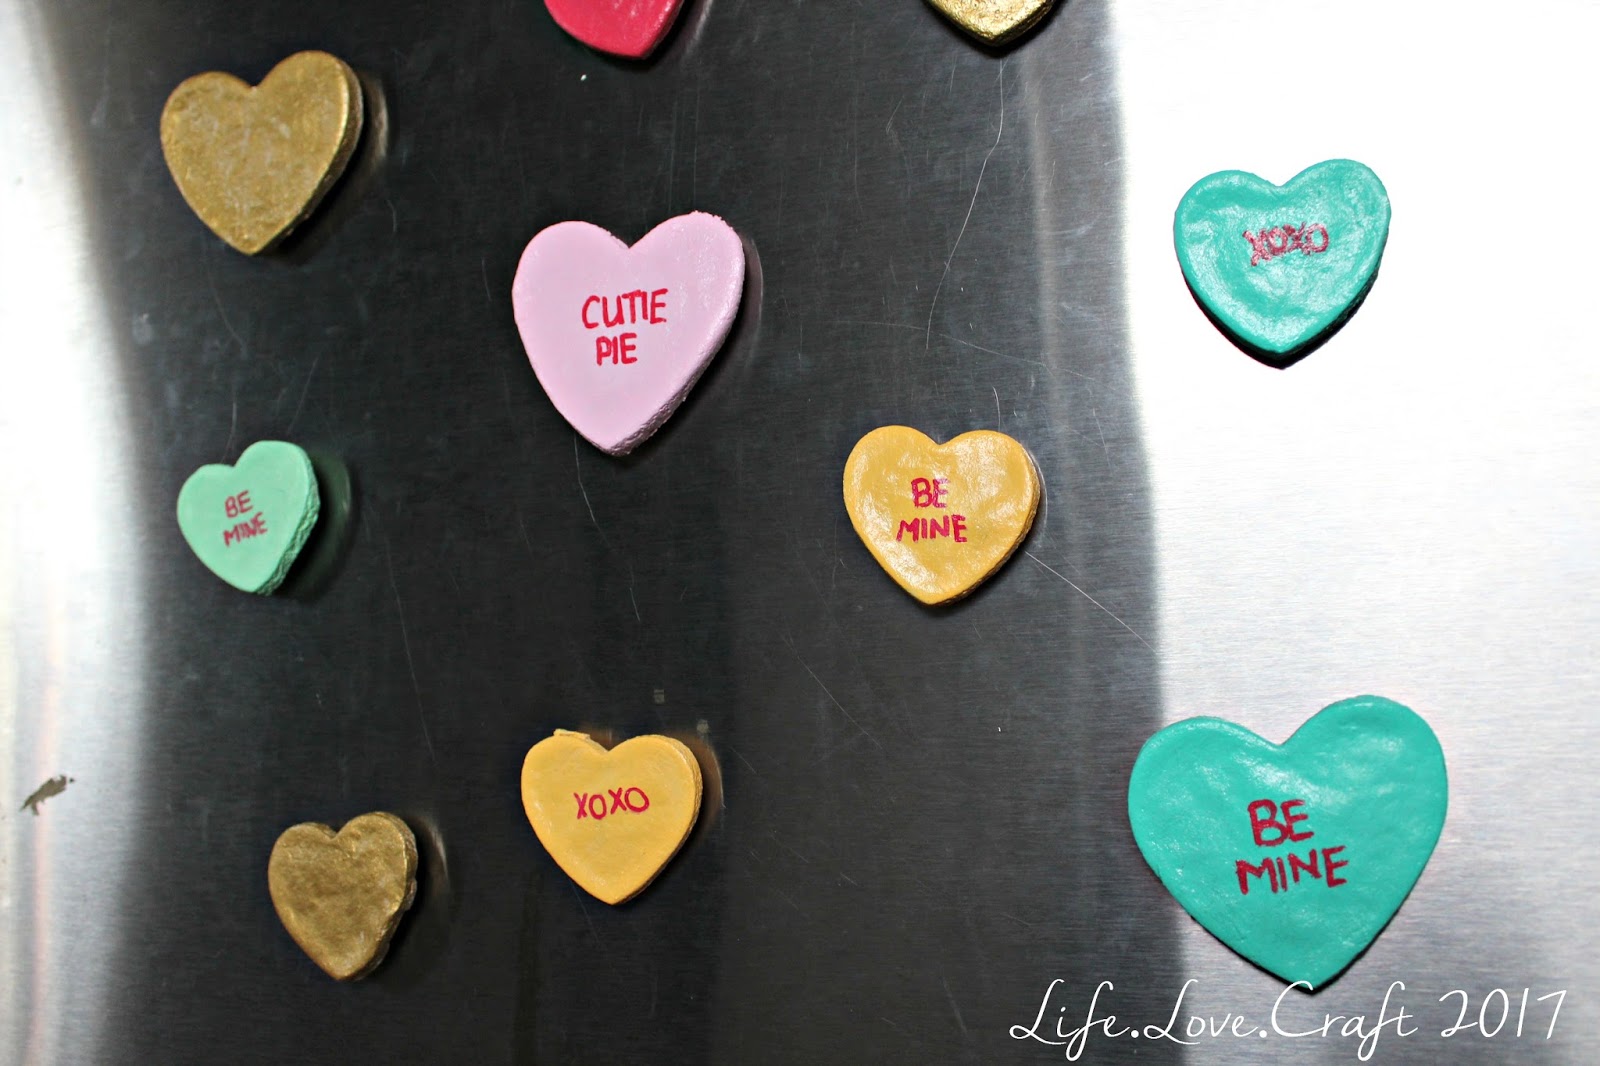
Let sit overnight and decorate however you like. I used some pastel colours for this craft as well as some paint for the other craft, planning on making conversation heart magnets. It ended up taking roughly three coats per side. I like to make sure that the salt dough is completely sealed with paint.
I'm sure you'll be very surprised to hear that the next step was to grab my red paint pen and write out the sayings on the magnets. I know, I'm as shocked as you are. I choose to stick with the basic sayings that you see on most conversation hearts, but you could get creative.
Next is a coat of Mod Podge on all sides and letting it dry. I used high gloss because that's what I had on hand, but I think matte might look better. Once dry glue magnets to the backs and let dry.
I didn't take any pictures of this step, but use tacky glue and larger magnets to support the hearts. I used hot glue because I didn't have tacky glue, don't do this. Especially if you are planning on these being gifts. These are just for us, so I deemed it safe enough. Plus, I couldn't get out to buy tacky glue.
These are pretty cute and would make fantastic gifts for grandparents or other family members. You can have the kids do thumb prints and date them as a great keepsake, and this is something you might want for your own fridge. Or you know, let them get creative and draw or write what they want.
A nice and easy craft, just how I like them. The whole craft took about a day including baking and drying time, with about an hour worth of effort. We will be making these again in the future, maybe next year, when the kids want to participate. I live for cute keepsakes like this.
Have you guys ever used salt dough to make magnets, or anything else? I'd love to see and get new ideas.
Kerby
Linking to:
Ginger Snap Crafts - Wow Me Wednesday #284
Two Chicks and a Mom - Funtastic Friday #112
eighteen25 - Show and Tell #7
Hello and welcome to another post featuring Kaley and her first birthday...hopefully you can survive one more post on this topic. I know it's a lot, but I want to share some pictures of Kaley's cake smash in case anyone at home wants to try this.
For Braxton's cake smash pictures we hired a photographer, and I love them so much but they were very expensive (with a capital e). When you are off on maternity leave versus staying at home without any leave, things like this become a luxury. So I decided to try to take my own pictures for Kaley's cake smash. I know they aren't as good as professional pictures, but I think I'll keep the $400+ and call this good enough.
I kept the theme for her cake smash the same as her birthday party, and actually used almost all the same decorations. I threw a pink plastic tablecloth on the ground with a large peach-pink piece of fabric over top. I hung a white paper tablecloth on the wall and taped paper stars to the backdrop. To cover the two tablecloths meeting I used tissue poms along the wall and outer edges of the area. Add a pink cake with star sprinkles and gold star cake toppers and you have yourself a cake smash area.
You can see how all of the stars and tissue poms were used at Kaley's party here. I think that this worked well, but the area seemed much larger before I tried to take pictures. Next time, or if I had to do this again I would add more of a side to the backdrop so that I could take pictures on angles. Braxton just sat and played with the cake for his, but Kaley was running everywhere. It was difficult to get pictures of her because I had to constantly run her back into place and try to take a picture before she took off again. Thanks goodness for Luis.
Kaley did not like touching or eating the cake, but she sure wanted to run away with the tissue poms and stars. The cake toppers were much cooler than the cake too, and eventually had to be put up so that we could get her to pay attention to the cake. Silly girl. It's going to pretty much be pictures from now on, so enjoy our little goofball!
This was a lot of work to get the decorations and area ready, but so worth it. I love being able to look back at these and remember how little they were and how much they have grown. I'm a very sentimental person and things like this (and throwing birthday parties with tons of decorations) make me happy and feel like I will have a fond memory to look back at. As well as something for the kids to look back at as well.
That's it folks, the last time you will here the words "first birthday" on this blog. And I promise no more birthday post for at least 11 months, maybe 12 depending on how crazy life is. I saved the best picture for last, enjoy.
Kerby
Linking to:
Naptime Creations - Great Things to Make for Kids 1/31/17
Ginger Snap Crafts - Wow Me Wednesday #284
eighteen25 - Show and Tell #7
Hello everyone, and happy weekend! After the holidays this part of the year always seems to drag on. I am actually looking forward to it this year, maybe in the lull I can actually get caught up on some things. Like I said a few weeks ago, projects out the wazoo over here.
So far I have shared Braxton's third birthday party (here if you missed it), as well as the paper rosettes I used as decorations (here if you missed those). So today I want to share the pinwheels that were made for the party. These are much easier than the rosettes, super easy in fact.
Grab some scrapbook paper and cut it into four even squares, or as close as you can. My paper cutter was having some issues, so some of my papers are a little wonky.
And my paper wasn't double sided so I cut out squares for the back of the
pinwheels. Glue these together with both of the patterned sides facing
out and trim if necessary.
Cut from each corner towards the centre,
leaving a roughly one inch space in the middle. You can see below with the red lines the general idea, just make sure you leave an area in the middle because you will need it to finish the pinwheels. And I think more is better here, you don't want a dinky little area because you will be gluing most of this in on itself.
If everything goes according to plan, you
should be left with four small triangle attached to the middle section
of your paper. Glue down every other corner of the triangle into the
centre of the square. I used a pencil to save my fingers from the hot
glue.
You
can see what I meant by every other corner a little better in the
picture above. Once this is dry, cut a corresponding circle of paper and
glue that down in the middle. If you're feeling frisky you could always use little gems or large sequins.
And that's it, as I often like to say. How easy are these? I could make these for any occasion and would adore them. You can even grab a paper straw, or skewer and glue that to the back and use it in a jar or pot on a table.
This was actually a craft that I enjoyed making, it was so easy I didn't really have to think while I did it. Very therapeutic, and great to binge watch TV while you are doing it too.
Happy crafting! Feel free to share if you make these, and any changes you make. I'd love to see them.
Kerby
Linking to:
Ginger Snap Crafts - Wow Me Wednesday #282
Two Chicks and a Mom - Funtastic Friday #111
eighteen25 - Show & Tell #13
Hello and welcome back! I hope everyone is having a great start to 2017, lots of goals and resolutions being started. In the past I have set resolutions, but this year I don't think I will. After the year that just passed, I don't want to make any promises (and that's probably best for everyone).
Back in December I shared Braxton's third ABC themed party, and if you missed it you can check it out here: ABC, Guess Who's Three! It was a quickly planned party that turned out fantastic. I wanted to share how to make the paper rosettes with you guys.
First you will want to gather your supplies: card stock, scissors, a ruler, a stapler, a glue gun (not pictured) and if you can manage it a scoring board. A scoring board is not necessary but amazing if you have it. I actually borrowed one to get this craft done and it made my life so much easier.
Fold your card stock in half lengthwise and cut it right down the middle.
Then use your scoring board lengthwise again every inch. If the last score doesn't complete an inch, that's alright. If you don't have a board you will want to mark out the inches and fold on them. You should be left with a long accordion piece of paper.
Then fold this paper in half (I folded with the smaller fold on the outside) and staple. I stapled at the tops of the folds, if that makes sense.
You will want to do this four more times to complete the rosette. Staple the four pieces together and push the middle in to form the rosette. Grab the hot glue gun and glue each piece together and put extra in the middle to keep everything stable. Once this dries you can add a circle of paper to the centre with some hot glue.
That's it! It's pretty easy once you get the hang of it. And to make the smaller rosettes, you can just fold and cut the paper width-wise and follow the steps to complete it. Like so:
How cute are these rosettes? They would work for so many occasions and really add a lot of drama to a background or area.
I will be keeping these bad boys for future use, as they are a little time consuming to repeat over and over. Are these not perfect for parties and special occasions? I think these rosettes would look great at a baby shower in soft pastels with gold and silver accents.
Have you guys ever made these? Feel free to share if you have, I would love to see them!
Kerby
Linking to:
Ginger Snap Crafts - Wow Me Wednesday #281
eighteen25 - Show and Tell #14
Hello again everyone and welcome back. See, I told you I was doing stuff. It just gets so hard to get on the computer anymore without having a child in my lap "helping" me type things. It's better to just not play that game.
I don't think I ever mentioned it here, but anyone who knows us can tell you that we are a gaming family. Luis is a gamer, he enjoys playing video games of all types. I am a part-time gamer, I will play or watch Luis play a game that I am interested in. We have games that we play together, and games that we play individually. It's not for everyone, but it's what we like to do. Everyone likes different things, this is our thing that we do together.
A few years ago we had a gaming related incident that involved a broken controller and a broken tray that I used in the basement to coral the remotes and controllers. These incidents are completely related.
The broken tray has been sitting in our crawlspace for years while I tried to figure out how to fix it or what I was going to do with it. I decided it would be nice to use this tray on the couch when we are having a snack so that we don't have to lean over to the coffee table. I know, first world problems. And since we have redone the basement with gaming related decor, I thought it would add a nice touch to incorporate this with the tray as well.
I thought long and hard about what I was going to put on the tray, whether it was going to be a recognizable symbol from a game or from a show. We love having game related things in our basement that most people will think is just nice decor, but people who play the game will get what it is about and appreciate it more. In the end I chose this triforce symbol because it was easy and is from a game that I love and have played many times myself. I like easy crafts, makes it that much more satisfying when you finish it quickly.
First I sanded the tray lightly, then I did a few coats of spray-paint in a glossy white to cover the finish. I was hoping that I could cover the crack with paint and not have to do anything else. Unfortunately the crack was extremely noticeable, so we had to come up with another plan.
I couldn't really get a good picture of the crack with the white paint, so I took a picture of the bottom to show you the crack and the previous finish. I couldn't find my before picture of the top of the tray, and don't mind the toddler foot. Though Braxton's foot makes this tray look huge if you thought that was my foot.
We decided to use the same kind of wood that we used for our coffee table update, but the oak instead of MDF. This stuff is fairly inexpensive and is easy to work with. I think this sheet, which we only used about two thirds of, was roughly $8.
Luis cut it to fit inside the tray and used clear paintable caulking to fill in any gaps. The inside of the tray is angled, so cutting the wood to fit perfectly was almost impossible.
Once the caulking set for a few days, I gave the tray another few coats with a semi gloss white paint. I did the whole tray, not just the wood insert and this helped blend the two paints together. The spray paint acted as a primer for the old stain colour, so it worked out perfectly.
Once the base paint was finished I traced the triforce shape onto roughly the middle of the tray. I cut out a cardboard triangle to use as a stencil, and the triforce is just four triangles. Easy peasy. I used a Martha Stewart gold paint to fill in the triforce and it took about 5 light coats to get good coverage.
The finish of the gold paint isn't flat, I chose to let the gold paint have different tones so that the triforce looked a little more metallic. It would have taken another 5 coats for the gold to be the same flatness, and I think it would have made it look a little boring. This way, it has more depth. And once I was happy with how the gold paint looked I gave the whole tray a coat of semi gloss Mod Podge. This will seal the tray against any spills or condensation from drinks.
I am so happy with how this turned out. It's nice to have the option to use a tray for snacks and drinks after the kids go to bed. Or even for entertaining, not that we do that a lot anymore. Kids are exhausting.
Hopefully this gives you guys some inspiration to update things the way you want to. It doesn't have to be the latest trend or look a certain way as long as you like it and it functions for your family. For the longest time I struggled with what I thought I should do and what I wanted to do. In the end, I need to let what makes us happy be what's in our house. We have to live with it, not anyone else.
Kerby
Linking to:
Tatertots & Jello - Link Party Palooza 12/16/16
Ginger Snap Crafts - Wow Me Wednesday #288