Hi everyone, sorry for disappearing on you for so long. It has been a crazy few months of getting things done that aren't really blog related, house maintenance and things like that. And if you follow me on Instagram you will know that we are moving from our first home!
We had to started getting this list of things done because back in March we decided that we had outgrown our current house and needed to move. The plan was to spend a few months getting the house ready and sell the house during the fall. We contacted a real estate agent to in March for a few reasons, 1. What our house was currently worth (we could guess all we want) and 2. What she suggested we do versus leave alone and not waste the time or money on. Long story short, we were plugging away at the list of things to do before we listed the house and she told us she had someone that really wanted our area and wanted to have her come through. This was only the beginning of April and we still had so much to do, but we decided that it might help narrow any problem areas for us.

We had the viewing that weekend and had an offer from them the same day at full asking price, so we accepted her offer and started our house search! Once we started, we realized that the market in our town was crazy and almost every house was being sold like ours, before it ever hits the market. We had a few weeks that were scary where we thought we would have to rent a place because we could not find anything we liked, but we ended up finding the perfect house. We didn't hesitate to put an offer in quick and buy the house, we didn't want to lose it.
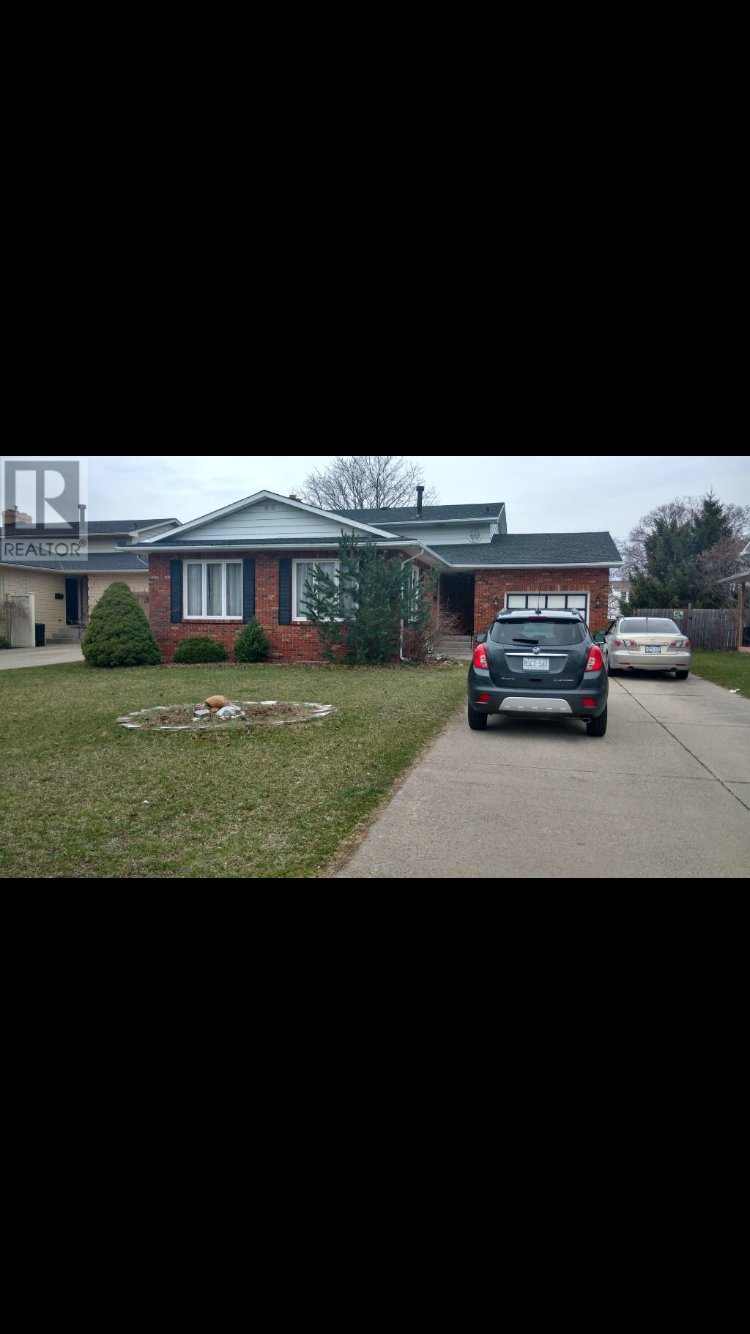
Please forgive me for the terrible picture above, I realized after we got home that I never took a picture of the front of the house!! This is off of the real estate listing, and wouldn't flip to full size for some reason. As you can see, we have our work cut out for us. This house needs lots of updating, like our first house did, but we are more than ready to turn this house into something amazing.
And that's all for now! We are currently packing everything we own, which is way too much stuff, and are moving at the beginning of July. Hopefully we don't get lost in all the boxes.
Kerby
Hello everyone and happy Friday! The weekend is here, and I am excited to get some much needed painting done. Painting is a hard job without kids being around, add a helpful toddler or two and it's basically an exercise in patience. The kids are going for a visit at their grandparents for the day tomorrow and I plan on getting a ton of stuff done. Plan being the key word.
Today I want to show you guys an easy way to cover an ugly drain pipe that can be seen when you have an open vanity in your bathroom. It is actually a really easy solution and won't take too much time or effort.
Back when we finished the basement renovation a few years ago, which included our half bathroom, we ran out of steam and left a lot of the decorative stuff for later. The bathroom sat like this for a long time and I got sick of looking at the drain pipe every time I was in there. It's not exactly the nicest thing to look at and always made the bathroom feel dirty, even though it wasn't. Maybe I'm alone in that feeling, but I thought that covering the drain while keeping it accessible would look much better.
So I asked Luis to make a cover for the drain using scrap wood from the basement renovation. He used some of the thin plywood that we have used in tons of projects (Tray update; kid safe coffee table inserts) and two pieces of 1x2 scrap wood. I told him I was going to be painting it and it would be mostly hidden so it didn't have to be beautiful.
It's nothing to call home about unfinished and sitting by itself but I knew that it would work perfectly to cover that ugly drain. So to recap, it's literally five pieces of wood that are nailed together to make a screen. We did a test fit to make sure that it wasn't too big and that it covered enough of the drain without taking up too much room. The shelf that it sits on is the main storage place for the vanity, so really don't want to lose that.
Already better. After a light sanding I grabbed the leftover wall paint (Turtle Dove by Behr) and gave it two quick coats. I didn't fill the gaps or anything crazy because I knew this was going to be almost completely covered once in place. Once dry I just put it around the drain, leaving a little clearance around the pipe. I didn't want it to touch the pipe, just sit in front of it. Then I put our basket full of extra toilet paper rolls back in it's place.
It looks so much better to me, almost like the drain is in the wall. And this keeps the drains fully accessible in the future so no worry about anything permanent to prevent a plumber or us from doing any work. It was such a quick and easy way to cover the ugly drain, and I love how much cleaner the bathroom looks.
Kerby
Hello everyone, and Happy Valentine's day. We didn't really do anything special as far as treats go for the kids this year. Braxton doesn't like anything sweet and we are trying to give Kaley a minimum amount because of that. So we kinda skipped the goodies part this year, and I;m sure their teeth will thank us. But remember, tomorrow all the candy will be half off! Best part in my books.
I decided to write about how well the flooring that we put down in the basement hallway has held up over the last two years. Two of the top posts on this blog are how we spray painted our counter tops and how well our spray painted counter tops have held up. Since this is a very similar situation, I thought it would be worth sharing.
In case you can't check out the original post about the hallway, here's a reminder of the hallway when we finished our basement renovation in 2014.
We used peel and stick vinyl flooring hoping that this would be a better solution to carpet and tile. We did not want carpet because our Bernese mountain dog (Motley) likes to lay at the bottom of the stairs and we knew that it would be a gathering spot for hair. As well as the cats spend time in the laundry room and tend to leave us hairballs in this area too. So carpet was out, and we didn't want tile because we thought it would be too cold on our feet. This is similar to what we purchased.
Well after just over two years, I have to say we are very sad that the floor did not last at all. The flooring has been destroyed between the largeness of Motley and it being a very high traffic area. The kids and I spend about half of our day downstairs, and when they go to bed Luis and I hang out in the rec room.
As you can see there are sections all over the flooring where the facing of the flooring has peeled right off. There are quite a few spots in this one area at the bottom of the stairs, which is Motley's favourite place to sleep when we are in the basement. His nails just rip the facing right off the base and then the traffic rips it further.
When this happens we usually just cut the raised portion off the floor, if it doesn't fall right off itself, and hope that it doesn't rip any further. Usually it does stop ripping any further, but we have put a remnant carpet (from the rec room) where Motley lays hoping to stop anything further.
And this is just a portion of the missing flooring. There is some in the bathroom and a large portion in the doorway to the laundry room. We figure the traffic of us going in and out started a rip and the cats finished it off one night when they were bored.
After all of this my opinion is that this flooring is either not meant to withstand a 120 pound dog continuously walking on it or not great for areas with high traffic. I would definitely opt for tile if you have the option, it is not that much more expensive and will probably last you a much longer time.
We will be ripping this out and replacing it with tile when we can because the tile flooring will be an improvement as far as we are concerned. This flooring is cold on the feet as well, so that's not an issue anymore. And it looks terrible now with all these rips, so anything would be an improvement.
Hopefully I was able to help you guys make a more informed decision regarding peel and stick vinyl flooring. If someone has had a great experience I would love to know, maybe we chose wrong or installed it wrong (though we followed the instructions perfectly).
Kerby
Linking to:
eighteen25 - Show and Tell #14
Ginger Snap Crafts - Wow Me Wednesday #286
Two Chicks and a Mom - Funtastic Friday #114
Tatertots and Jello - BFF Link Party 2/17/17
Naptime Creations - Create, Link, Inspire 2/27/17
Hello everyone and happy new year! I can't believe it's already 2017, and how little I got done in 2016. Hopefully this year I can pull my socks up and get some things accomplished, since my project list is about four pages long now! I guess that's what happens when you have a baby and a toddler, life gets in the way.
Anyway! Back in early 2015 I shared an updated gallery wall on the wall connecting our living and dining room, you can see the original post here. But as a reminder, here is a picture where I left it at the "in progress" stage.
It seemed like the perfect spot and solution to our giant 22 foot wall, but after living with it for almost two years we decided that it was a terrible spot. The pictures closest to our dining room table kept getting knocked off the walls when people would walk around the table. The poor picture frame with Motley in it has been hot glued back together more than once.
So it was time to move the gallery wall, and after much discussion and furniture rearranging we decided to move the couch from in front of our window to this wall. We kept it in the living room portion of the wall, and it was a great decision. Not only does the room flow better, but the Braxton was able to look out the window without sitting on the top of the couch (and sometimes falling into the window).
Once we had the location picked out, I measured and got working on the frame arrangement. Earlier in the summer I had spray painted all the frames that I had waiting to be added to this gallery wall, so I was able to make a much larger display.
Don't mind the terrible picture, I had to do this after the kids went to bed when it was extremely dark out. I didn't want them "helping" me with this because I really didn't feel like replacing frames. And the beautiful tent in the background, don't mind that either. Real life people.
Once I was happy with the placement, I bought enough command strips for an army and conscripted Luis into helping me as well as sending the kids to my parents house for the afternoon. This is definitely a two person job because you need to use multiple levels and measure spacing, all of which I am terrible at. Thank goodness I have a husband who puts up with my decorating decisions.
And there is the final product! I didn't take any pictures of the process since there are many tutorials all over the internet, but it took us about 3 hours in total to get all the frames onto the wall. I love how this turned out! It still has a little tweaking to be done, but for now I am happy with how this turned out.
And we are loving the living room the way it is now, it's so spacious and there is an amazing amount of room for the kids to play. Which is probably the most important thing to us right now, since we both hate tripping over toys. It will probably stay this way for the foreseeable future.
You can see that I did not include the quote in this new gallery wall, and there were a few reasons. First was that the vinyl was in terrible shape and stopped sticking to the wall, and the second was that I am planning on making a sign that has our last name and an established date on it. This will probably go directly below the shelf and I will move that frame to the right to replace the frame at the top right. I am also planning on either buying or making a marquee letter to go on the shelf, we will see what happens there.
Well, that's it for today! It's a small post but a huge update to us, and I thought that I would share how plans change all the time. What I see in my head doesn't always translate well in real life, or might not always be ideal. You just need to try new things and be willing to adjust and adapt. Feel free to share your gallery walls or suggestions, I love to see and hear them.
Kerby
Hello everyone and welcome back! I feel like I never get to post anymore and I don't because life is just so busy. There always seems to be something going on, or something coming up. My crafts and the things I have planned to make always take the back burner. But things could be worse! Today I have a post that's a little different than my normal quick craft, recipe or picture of my adorable kids. I thought I would share with you guys a recent problem and the solutions that I found, and maybe I can save you the trouble of having to search the answers out yourself.
I'm not sure if this is a problem that everyone has this time of year or if it's just us, but it can be said in one word: ants. Does anyone else have a battle waging against ants this year or is it just us? We cannot keep them from coming into the house and I have been trying to find non chemical solutions for inside the house so I don't have to worry about the kids. Just a warning that this post will not have many pictures, but bear with me.
I found that they were
coming in through a tiny gap in the front door and found a line of the
buggers straight to the kitchen. I didn't stop to take a picture because
I was busy vacuuming them all up. But just when I got them all I would
see another line on the move. First I tried to use a liquid ant bait outside the door where the kids could not get to it and people wouldn't carry it in with theirs shoes. This is what I used, and have had luck in the past in the basement. It's the same thing as an ant trap, except its a liquid that you place where they are coming into your house or on the ant hill itself. Since I couldn't find the any hill, I chose the house.
This stopped them for about an hour, and once all the liquid was gone (either from the ants or because it started to dry up) they started their march right back into the house. Cue the angry face emoji here.
So off to Google I went
and tried to find a few ant deterrents or killers to keep these guys
from coming into my house and trying to move in. I found a few all natural or chemical free methods and I though I would list them here and if they work.
1. Vinegar
I know that vinegar is a good way to kill ants, especially if you pour it directly onto the ant hill. But I always feel bad for pouring what amounts to acid right on the ants, so I don't like to do it unless it's completely necessary. I read however that vinegar is a great non chemical way to disrupt the trail that they follow, so I was game to try that.
After watching them for a while I knew the trail and poured a generous amount of vinegar all over the line and around it. I did kill a few ants (which I do feel bad about), and this worked for a little while. But again, once the vinegar dried the ants just followed the same trail right up to the house. So to me, this little tip was a bust. And a waste of perfectly good vinegar that could have gone on my french fries.
2. Baby Powder (Talcum Powder)
I also read that baby powder is a great ant deterrent and will keep them from entering your house because they won't cross through the powder. I just happen to have a ton of baby powder so this seemed like a great one to try. I grabbed the baby powder and sprinkled a generous amount all over the threshold and around the doorway.
This actually seemed to deter them from coming into the house, even though it looks terrible. Hallelujah! And please ignore my horrible front doorway that I know needs some serious TLC. It's those "other" things that pop up I swear.
But they were still coming right up the baby powder and looking for another way in. I knew I needed to stop them from coming and that meant I needed an option that would kill the colony.
3. Baking Soda & Icing Sugar
The first thing I read was to mix equal parts of baking soda and icing sugar and place near the ant hill. I tried this and it was a big fail, they just went around the mixture and kept on coming. I remembered my mom did something similar and after a few questions was told that you had to mix water into it and then set it out for the ants.
Once I did this the little buggers went right for the sweet mixture and stopped their little march to eat.
Apparently baking soda reacts with the ants stomachs and kills them, and when mixed with icing sugar to attract them they cannot tell the difference and will eat all of it. As well as taking it back to the colony for everyone to eat. Sorry little dudes, but I can't have you in my house. After all of my many attempts they seem to have stopped coming into the house and the colony probably be killed from the raid and baking soda. Again, I do feel bad but there are only so many things you can try.
The original article is here, in case you wanted to try a few other methods. But these were the three I tried and what worked for me. Hopefully this will help you if you have any ants that are trying to move in. And if you have any other non chemical ways that work for you please feel free to share. I could use an indoor option to add to my ant busting arsenal.
Kerby
Hello everyone and welcome back! Summer is almost over and I am desperately trying to get some last minute crafts done before the crazy seasons start to happen. We have Thanksgiving, Halloween, Christmas and two birthdays in the next four months! I think we may just be crazy people.
Anyway, I have had this on my to do list for some time now, and I finally found the wood I was looking for to get it done. I love the idea of having door signs on kids rooms for a few reasons: 1. Kids get used to seeing their names and start to associate it with themselves; 2. Other people (and kids) know whose room it is because they can see it on the door; and 3. If there was ever an emergency it is easy to identify where the children's rooms are located.
I would love to use vinyl down the road when we replace our doors, but who know when that will be. Doors are expensive people, I had no idea. But for now, these cute little signs will do the trick.
 You will need a few things, so head to the craft store to grab them.
You will need:
- Balsa wood (found at craft stores)
- White spray paint
- Name printed in font choice
- Pencil
- Paint (in colour of your choosing)
You will need a few things, so head to the craft store to grab them.
You will need:
- Balsa wood (found at craft stores)
- White spray paint
- Name printed in font choice
- Pencil
- Paint (in colour of your choosing)
Here is what the balsa wood looks like when you grab it at the craft store. I can't remember the size that I chose, but there are a few so choose the one that fits your door the best.
Lightly sand the top and all edges of the wood to remove any rough spots. Next give one side about four coats of spray paint. I chose to hand paint the sides of the wood to save myself some spray paint for another project. You can do this either way, just wait the full curing time as per the spray paint to be safe.
Once your wood is dry and ready to be painted you will want to choose a font for your child's name. I choose Waltograph because who doesn't love Disney letters?
Print this on regular paper and shade the back of the names with the side of you pencil. Make sure you have an even coating and cover each letter.
Tape this bad boy to your wood in the center and trace the letters with your pencil. You will want to press really hard so you can transfer the pencil on the back of the paper to the wood. Once you are happy with your letters grab your paint and start carefully filling them in.
I felt that they needed a little more detail than just the names, so I added some pretty flowers to the edge of Kaley's sign and a masculine edge to Braxton's sign. Here's a better picture of each sign.
Then I grabbed my trusty command strips and put them on the kids doors. I wanted them high enough that the kids couldn't take them down but still low enough for them to see their names. I think I could have lowered them just a touch, but not enough that I'm willing to waste command strips over it.
I love that these signs now define the kids spaces and lets other people know what each room is. And it's great for Braxton to see his name every day as well as see that it marks this room as "his". He was a little confused because he used to be in Kaley's room, and now it's not his space anymore. Hopefully as time goes on he will learn how to associate his name with his things.
These are so easy to make, and you know how I love an easy craft. You don't even need to do this for your kids rooms. These could be made for your laundry room, or even a bathroom. Imagine no longer having to tell people where your bathroom is, just follow the signs people. You're welcome for making your life a little easier.
Kerby
Linking to:
Ginger Snap Crafts - Wow Me Wednesday #284
Two Chicks and a Mom - Funtastic Friday #112
Hello everyone, hopefully everyone is enjoying the warmer weather. Braxton has been itching to go outside and walk for weeks, so I have been indulging in sunny walks whenever I can.
That being said, my little guy isn't so little anymore which is bumming me out. Braxton has recently started to try climb things and his crib is the main thing that he is testing out. We are terrified that he is going to fall out because we have hardwood floors upstairs, so we thought we would start the process of a big boy room. He has always been slow to transition (i.e. stubborn as heck), so starting early is probably in our best interest. I cannot believe that I am already starting plan out Braxton's big boy room.
We are going to move him into the spare bedroom, which has just been a storage/dumping ground for the last few years. Here is what it looks like currently. Please excuse the mess, we are in the process of moving everything to store, sell, donate or throw away:
Hello and happy Thursday to one and all. I know that Valentine's day is quickly approaching and lots of other blogs are just riddled with great ideas for crafts and recipes, but I just cannot get into it. We have never been ones to make a big deal about it, so it's hard to find things that I want to do. At least next year Braxton will be older and give me a reason to find fun things to do.
So after getting that off my chest, today I want to share an idea that is about a year in the making. When we decided to do the basement, one of Luis' biggest requests was to not have the gallery wall back up in the basement. He hated how the pictures would move if the volume was turned up, or my complaining about the pictures moving. Jury's still out on that one, and Luis is not telling the truth.
So once it was decided that the basement was no longer the location for the gallery wall, I needed to find a new home for it. After sitting on the couch with a newborn/baby for a few months in our living room, and idea dawned on me. Enter the wall that I have never known what to do with (view from the living room):
Hello everyone, today I thought I should share the other half of the rec room with you guys. And since I've shared every other part of the basement, it's about time. I shared the built-in's with you guys here, which was one side of the rec room.
Like I mentioned before, this renovation was fueled by the need to have an animal free zone for Braxton, which would also be baby proofed so that we would have some peace of mind. So most of the updates that we made had this as our number one goal. Before I get too ahead of myself though, here are a few before pictures (sorry for the bad quality, they were taken almost five years ago):
Happy Friday everyone, can you believe how cold it's gotten in just a few days? The white stuff finally made an appearance a few days ago and I am in denial that winter is almost here.
The biggest change we have made in the current basement renovation has been in our rec room. Here is a quick picture of how it looked just a few months ago:
Happy Friday wonderful people! The weekend is almost here, so sit back with a nice coffee (or tea) and enjoy another basement update from yours truly.
Today I want to share the rest of the hallway and stairs. This update is mostly cosmetic as it was just a little drywall, a new light fixture, some paint and new trim, along with an update to the stairs I refinished here.
But first, a look back to how this area looked when we bought the house:
Happy Monday everyone! (Please don't throw things at me)
Today I want to share a transformation that happened last year, but I never shared with you guys. Last spring we converted our old computer room into Braxton's nursery. And what a transformation it was!
Here is the before picture; a little history to the colour of this room. When I lived at home, I always swore that my "office" was going to be red. So, once we bought this house the very first thing I decided, the computer room was to be red. Not sure if Luis even knew what was going on until he was fully committed.