Hello everyone and happy weekend! How quick is this year going? I can't believe it's almost the end of February, it's like I blinked and a month flew by. But I'd rather a winter month disappear quickly than a summer month. Fingers crossed we only have two or so months left until we start to see spring.
Back in January I shared an alphabet matching game for Valentine's Day (which you can find here), and I mentioned that I had leftover Bristol board that I had a plan for. Well today I am sharing what you can make with a small piece of Bristol board and a few minutes of your time.
I thought that numbers would be a good compliment to the alphabet, though Braxton is becoming such an old pro at these I might have to get creative and start with some different learning tools.
I traced the square ten times onto the Bristol board, then traced the star inside the square in a pattern. I used my trusty paint pens in blue, green and purple. Then I used a stencil to add the number to the board and the pieces of foam in black paint pen.
For this matching game I used foam shapes that I had on hand from a project that went bust a few years ago, and I thought they would work perfectly. I mentioned using foam pieces with the alphabet matching game as well. Ideally I would have had ten of one shape, but alas I only had six. So I got creative and made the game a little more challenging, hopefully. At least it looks pretty.
Braxton loved this one too and again needed no direction. He had a little more fun bending the foam shapes and adding them to the puzzle, and some of the shapes got quite ruffled. It is such a great exercise that gets their minds working, even if they know how to count to ten.
This was another inexpensive project that took zero money and little time, and it gives Braxton something new to play with and think about. And once Kaley gets a little older she can start to play with it as well. The foam will stand up to little hands so much better than paper or card stock, so definitely go for foam if you have the option.
This is a great way to kill some time during the winter months where everyone gets so restless, including mom and dad. Give this a try and let me know how it turns out!
Kerby
Linking to:
Tatertots and Jello - BFF Link Party 2/17/17
eighteen25 - Show and Tell #15
Gingersnap Crafts - Wow Me Wednesday #287
Two Chicks and a Mom - Funtastic Friday 2/23/17
Hello, hello and welcome back! I am finally starting to feel the motivation and momentum to get things accomplished. I've had a list of little projects (crafts or small projects that don't require power tools) for years. And I am finally making a dent in the list! I know it doesn't seem like much, but I am very excited about this.
Today is a special day, I actually have a Valentine's Day related post! The first one in two years, and only the second I have ever done. I'm not a huge Valentine's Day person and have not made a big deal about it in past years, but with the kids I want to at least make an effort. Once they get into school it will be something to look forward to, so I can suck it up and do a few crafts for them. Like I need a reason, am I right?
Anyway, back to the matter at hand. I have had this idea pop up on Pinterest for every holiday, different learning tools (alphabet, colours, numbers, etc...) and in every size, and with Braxton's LOVE of the alphabet it was an easy choice to make. I wasn't sure about the size I was going to make and was aiming for about the size of a Bristol board.
The supplies were minimal since I have so much on hand at all times, but here's a general list if you need one:
1-2 pieces of Bristol board (I used 1 1/2)
10-14 pieces of card stock
Markers (I used paint pens because I don't have markers)
Tape (depending on size)
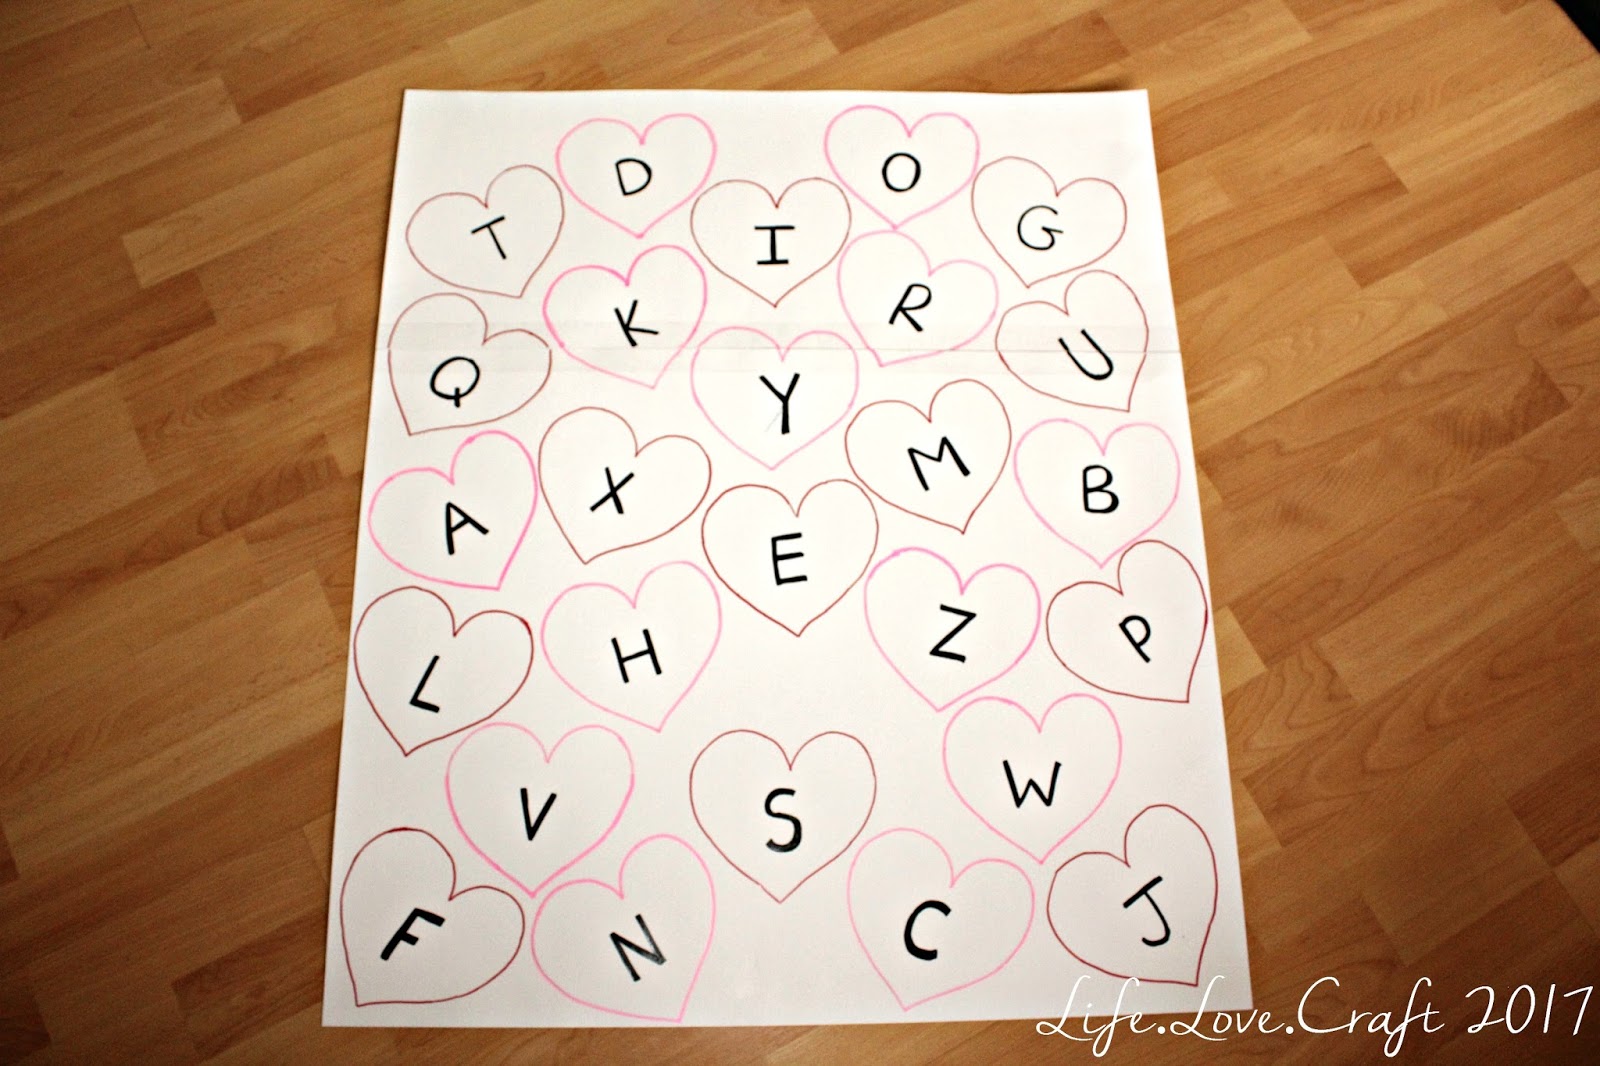
First I cut out twenty six hearts on four different types of card stock, just free-handing the first heart and using it to cut the rest out. If you don't care about the hearts being perfectly the same, cut two or three pieces of paper at the same time. I chose to put the lower case letters on the hearts using a black paint pen, but a Sharpie would work too.
Then I used these hearts to trace onto the board, and because of the size of my hearts I used just under half of a second piece. If this happens to you, just tape the two pieces together with packing tape after you are finished writing everything on the boards. Again I used paint pens to make the hearts red and pink, the used the black paint pen to put the upper case letters in the hearts.
Now step back and watch your toddler go! I set this up while Braxton was busy in his room so when he came downstairs he was so surprised and excited. He didn't even need me to tell him what to do, he just went right for it.
Singing the alphabet while they work and making the sounds the letters makes this a fun and educational toy. The best part? It cost me less than $2 to make because I had everything I needed except the Bristol board. I love being able to make learning fun for the kids and every chance I have to expose them to the alphabet, numbers, colours (you name it!) I will take.
I am sure that Braxton loves these types of toys and learning tools so much because we are constantly exposing him to them and playing with them ourselves. It's never too early to start the foundation that they will need once they get to school. Okay Mom voice over now.
And I never feel bad about a cheap and easy craft, especially one that helps my kids learn! I haven't let Kaley near it because I am 100% certain she will rip everything into little pieces. A great alternative is to buy the foam hearts at the dollar store, that way they can't rip them easily. I didn't see them until after I had cut the hearts out already, but will definitely use them in the future because I am sure I will be making more of these for Kaley.
Now you have a fun way to incorporate something educational into Valentine's Day for your toddlers. Let me know if you try this out and what you change. Stay tuned for what I used the last little piece of Bristol board for! I bet you can guess, but still, come back and see.
Kerby
Linking to:
Two Chicks and a Mom - Funtastic Friday #111
Naptime Creations - Great Things to Make for Kids 1/31/17
Ginger Snap Crafts - Wow Me Wednesday #284
eighteen25 - Show and Tell #7
Hello there and welcome back! It's a beautiful day and I am hoping to get tons of stuff done. Yeah, that's what I tell myself every morning, but the day usually ends with the house worse off than it was when I woke up. Slow and steady over here.
Today I wanted to share a fun, easy and great idea for your little guys and girls. It's a fun sensory bottle that will help your kids unwind and relax if they get too stimulated.
First things first, gather your supplies. You will need white rice divided into plastic bags (about 1 cup per bag), food colouring and vinegar.
Add roughly a tablespoon of vinegar to the rice bag and as much food colouring as you would like. Now shake those bags until all of the rice is nicely coloured.
Once you are happy with the colour and coverage, spread the rice onto wax paper to dry. Try to get an even layer so that the rice will dry evenly, it should only take about an hour. It may clump a little, just do your best.
Once it's dry you can use your hands to break up the clumps in the rice and get everything nice and loose. Using a funnel you can layer the rice into your container, if you do multiple colours.
I made another rice bottle earlier when I was testing the dying method on the rice, so I choose a few different colours. You can see of the left bottle how the rice will combine once the container gets shaken. So make sure you pick complimentary colours so that one colour doesn't get lost when mixed together.
Braxton absolutely loves these and carries them around when they are out, because if I don't put them away occasionally he won't play with any other toys.
We put them in his bedroom one day and he didn't fall asleep for over two hours past his normal time! So maybe don't put them in your kids bedroom if they really like them.
Have you guys tried any rice sensory bottles or activities? Or have another method to dye rice? I'd love to see.
Kerby
Hello and happy Wednesday! I am super excited that I actually had a post in the works before Kaley was born that I can share with you guys. Back in July I shared a toddler activity that I tried with Braxton that didn't go as planned. My difficult little man kept his name and wanted nothing to do with mixing paint in a bag. Oh well.
After his party in December I took the stars that I had on the wall and put them lower for him to play with. He loved them! Eventually they were destroyed because they were just made of scrapbook paper, but that gave me an idea. Braxton loves to count to ten and the alphabet, I wasn't about to cut out 26 things. But ten, ten was manageable.
Hello there and welcome back. Today I want to share a fun activity I saw on Pinterest forever ago and thought I would try with Braxton (the original pin is here, if you would like to take a look). We had a few super hot days where we didn't want to be outside for too long, so it was the perfect time to give a toddler activity a try.
You only need a few supplies: a plastic zipper bag (or two if you're me), some washable paint and some painter's tape (masking tape would work as well). I poured a large amount of the washable paint into a Ziploc bag, then doubled bagged it. With my history, one bag would have caused a large mess. Better safe than sorry.
Use the painter's tape to tape this bad boy to a window or glass door. I taped mine to our back sliding door, please ignore any drool stains. And I forgot to clean the toys and such from the deck, so please pretend they are not there. Thanks a bunch, you guys rock.
Then try to get your toddler to acknowledge that you even did anything. Seriously! It took Braxton about two hours to even pay attention to the paint bag, even when I started playing with it. He just ignored it and decided that we needed to wrestle instead.
Feeling my utter defeat, he gave me a few pity hits and went on his way.
No one can say I didn't try. Maybe it was the fact that I used white paint? Maybe I will dig out the red washable paint and give this another try. If not, oh well. Not all toddlers like the same thing. Back to the drawing board I guess.
Have you guys tried any fun toddler activities? Feel free to share. I want to gather a bunch for the upcoming cooler weather (boo!) and new arrival. Momma is going to need some fun things to keep everyone happy this winter! Wish me luck on my next adventure into toddler fun.
Kerby